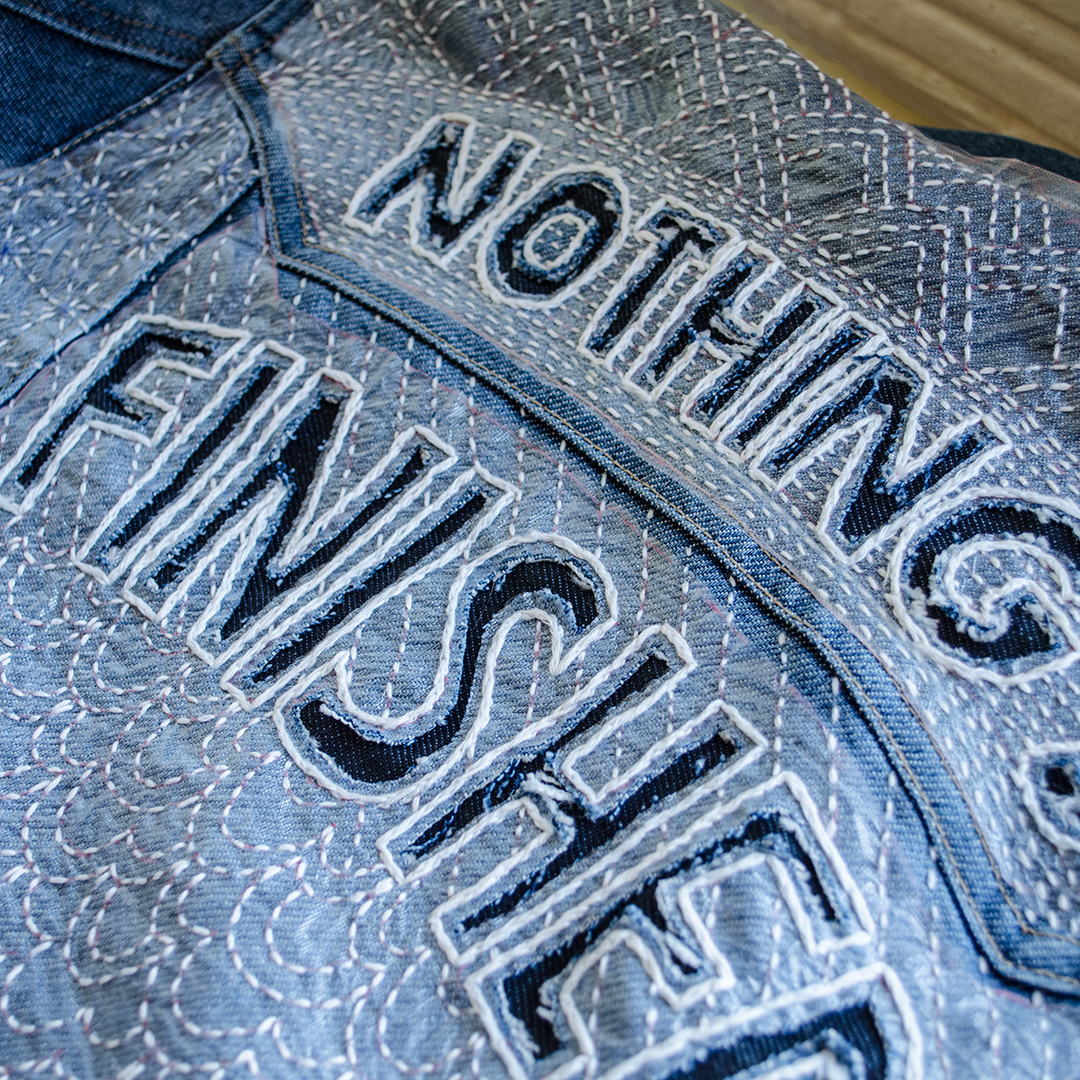


This is the second piece of a personal project I am working on over 2017 entitled “Body Text” that explores our complicated relationship to our clothing. Follow along on my instagram and/or tumblr blog.
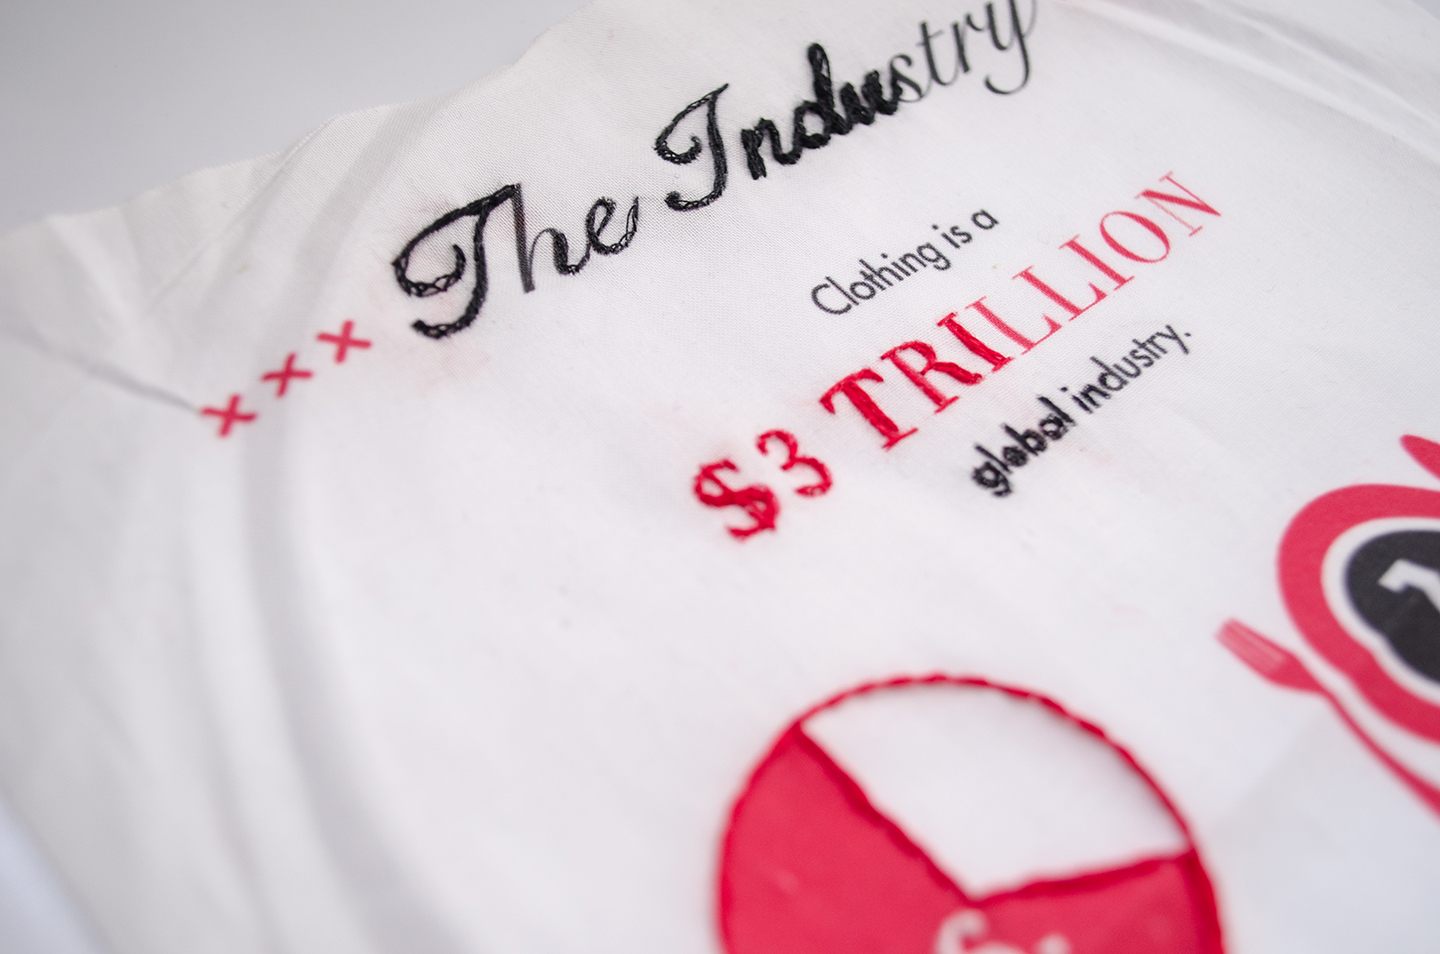
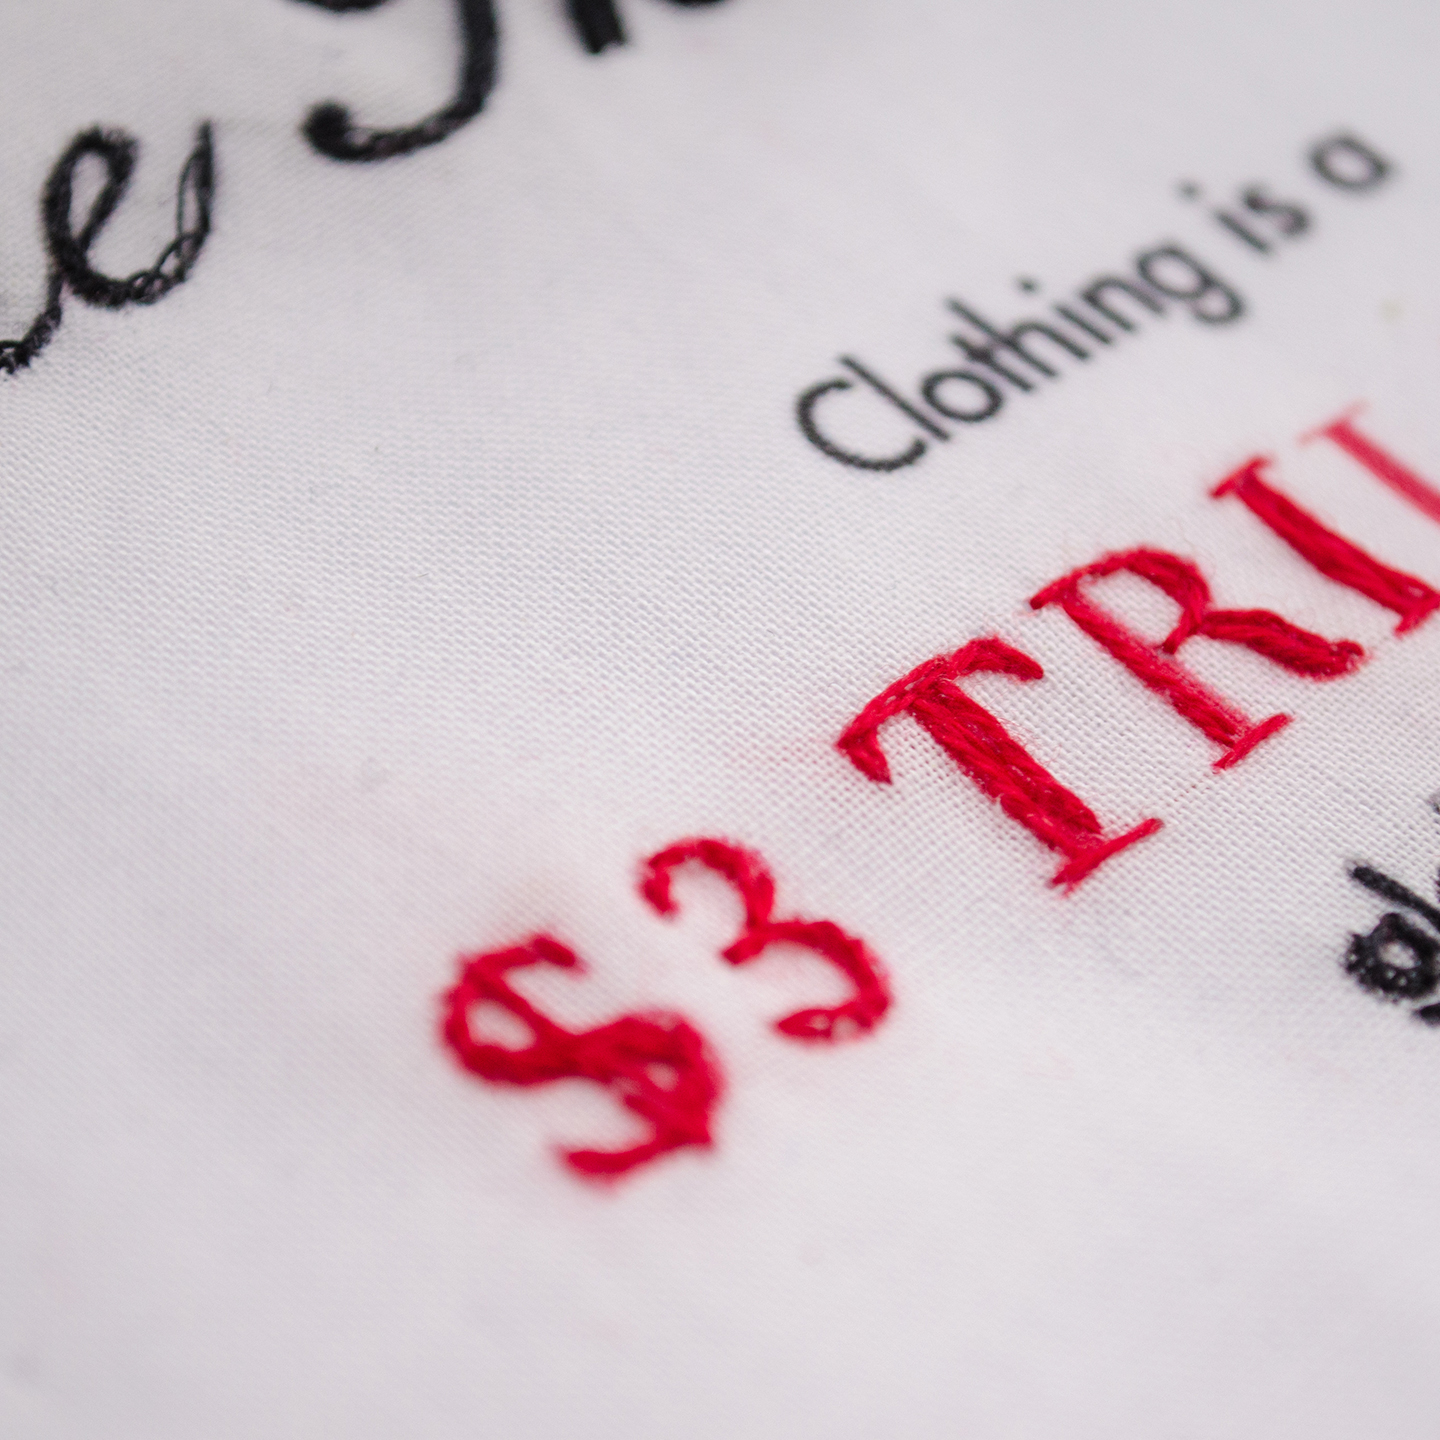
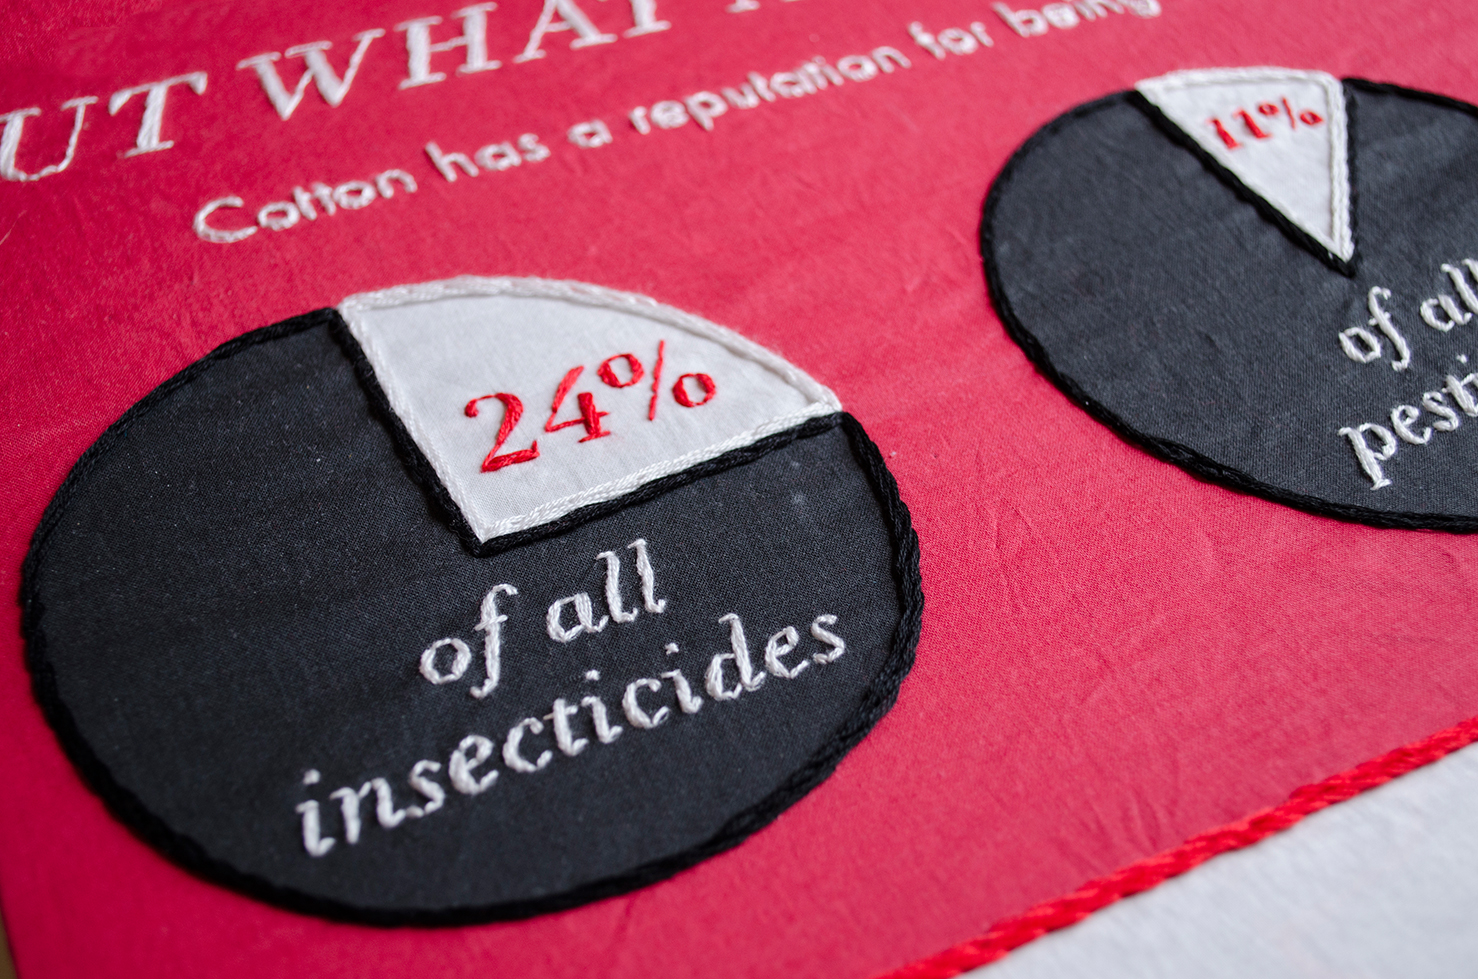
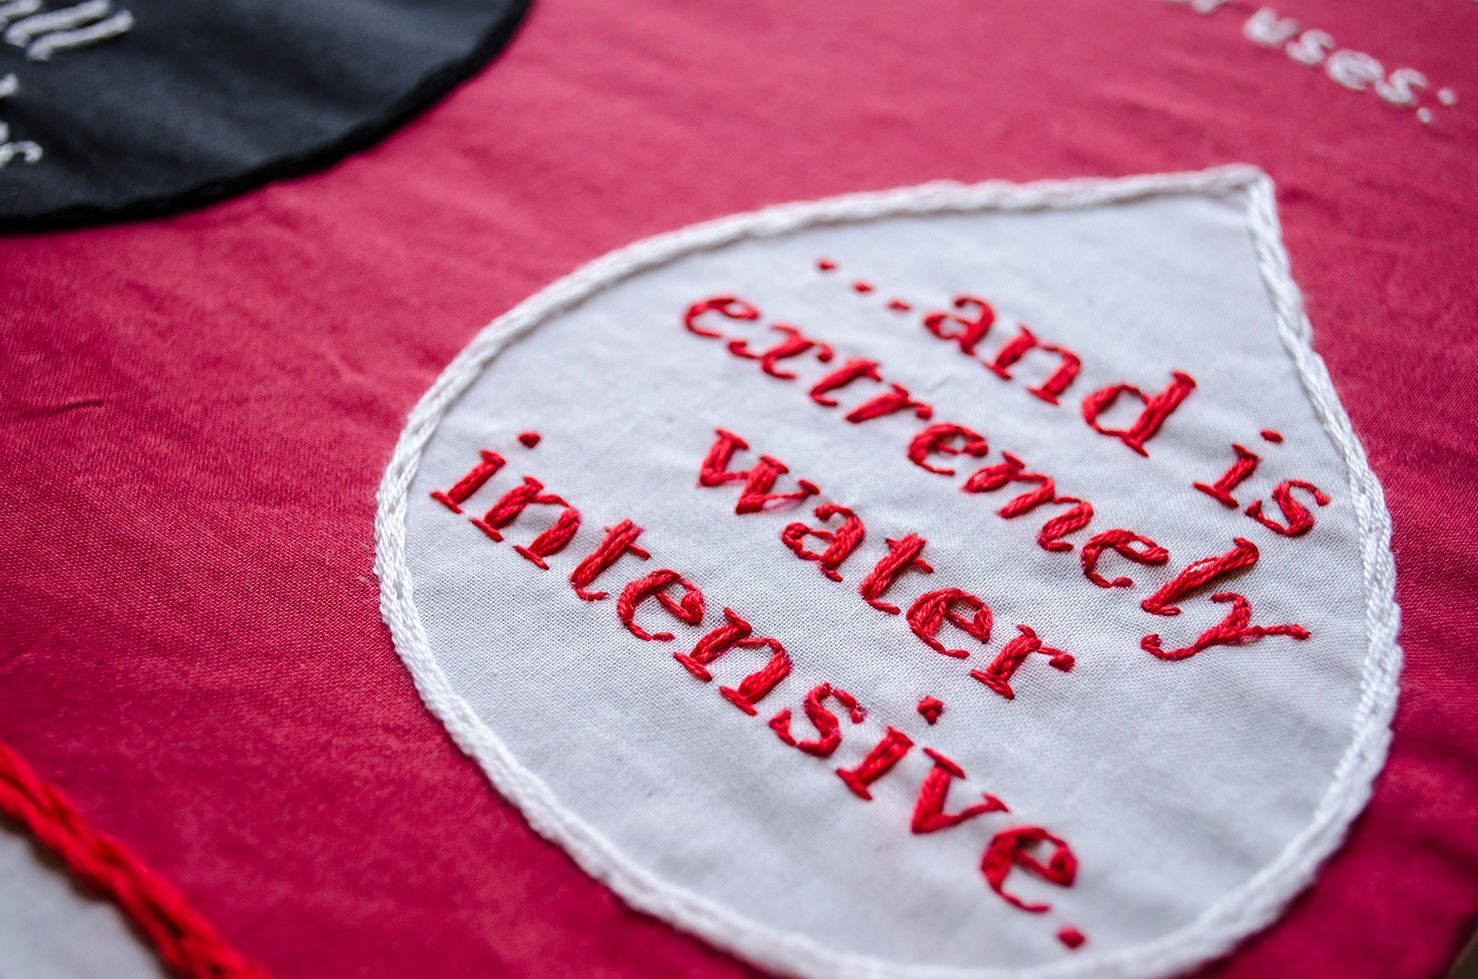
I long had in my mind that I wanted to try making a stitched infographic, so it was exciting to finally get my act together and actually do it! I chose as my subject matter our relationship to cheap clothing stores (fast fashion), and its effect on the environment. There has been quite a bit of awareness about this for the past few years, with many articles and a few books on the subject. (My sources are listed below.)
The topic of fast fashion resonates with me as it includes 2 areas I’m interested in- how to make your clothing feel like your own and express what you would like it to express; and managing money and resources. I think cheap clothing can work for or against both of these. Shopping constantly to keep up with trends can make everyone look pretty same-y. On the other hand, many of the cheap clothes are decently well-made, and can be customized, kept for a long time, and combined with more unique or handmade items. And obviously- shopping for cheap clothing can save a lot of money… as long as it isn’t done constantly. If the low cost of clothing is used to justify buying massive amounts, it becomes more expensive as you need more space to store the clothing (not to mention the time cost of all the shopping), it’s harder to move, and more expensive (especially if you look at the city-wide level) to dispose of.
One thing that really struck me while working on this project is how hidden a lot of the costs of purchasing cheap clothing are. According to what I read, the quality of much of the clothing we buy has gotten so poor that even if we donate it to charity, it’s unusable- even by very poor countries. As in, most of it is worth less than a nickel per pound, even to textile recyclers. And it costs A LOT for cities to dispose of- which we pay for via taxes.
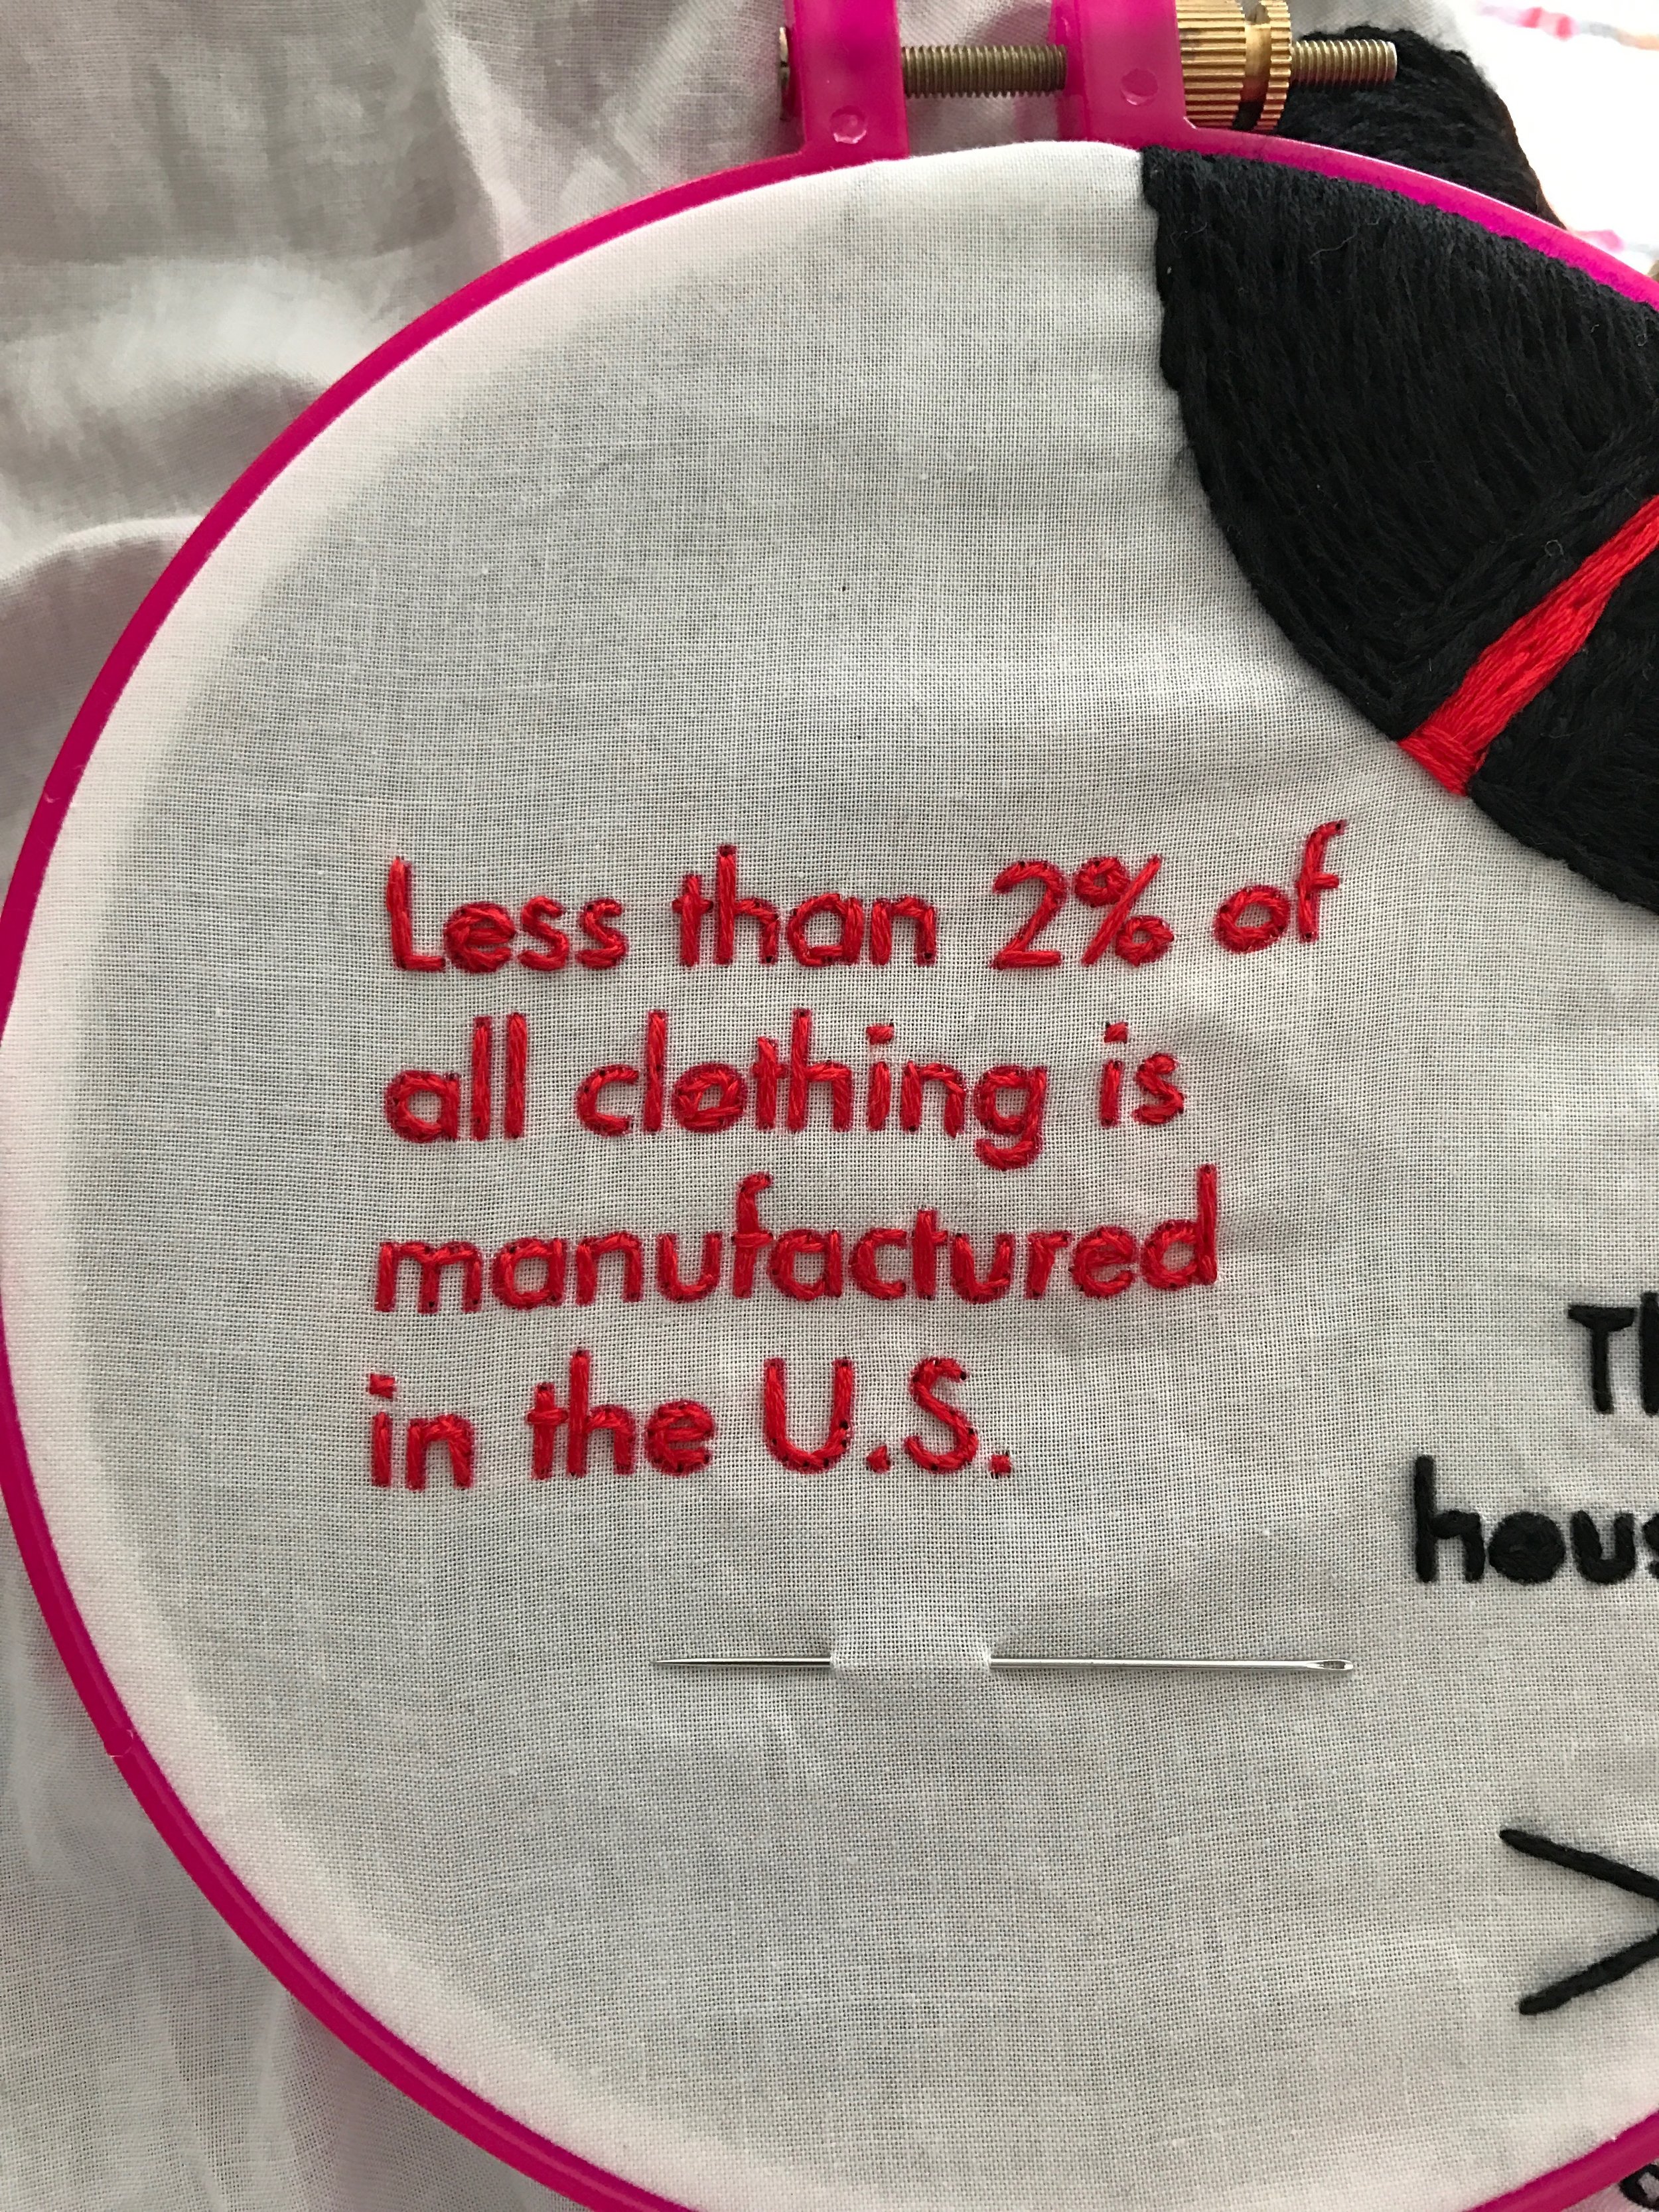
It’s a deep topic that I admittedly haven’t fully investigated with this infographic. I can see doing full projects dedicated to exploring very narrow aspects. For example, I read about whole cities in China that are dedicated to producing one item- like neckties. And pondered whether extremely cheap clothing is worth the trade-off of not having the clothing manufactured in the US, and the associated loss of jobs (I don’t know the answer to that one, but lean towards “not worth it.”) I read some crazy statistics- for example, apparently if every man, woman, and child in China bought 2 pairs of wool socks, there would be no more wool left in the world! And wool isn’t even that expensive right now.
My take-away after doing this project and thinking about it is this: We all need to wear clothing, and that clothing needs to be manufactured somehow and somewhere. Probably buying less, but more expensive, clothing of higher quality manufactured in the US would be better, but that cat’s out of the bag, and it’s not going back in, at least not any time soon. We have to do the best we can with the reality as it stands today, though perhaps that reality will slowly change if enough people change their personal habits. I don’t think it’s terrible to shop at places like H&M, Uniqlo, Zara, etc. They carry good-looking products that are sometimes reasonably well-made and very cheap. But I think that the way to do it is to pick only what you really like and need, selecting the best quality you can from their offerings, with the mindset that you will wear it for a long time. Then, don’t treat them as disposable- take care of the clothes so that they last. Learn simple repairs, and repair them when you need to. Basically, shop for and treat cheap clothing the same that you would expensive items.
Personally, I am now thinking harder about what I really “need”. Do I already own something similar? How few pairs of something can I get away with? What do I own that I can I repair or alter to give it more life?
In the future, I may do projects on the topics of how to repair clothing, and how to tell a piece of clothing’s quality.
Method:
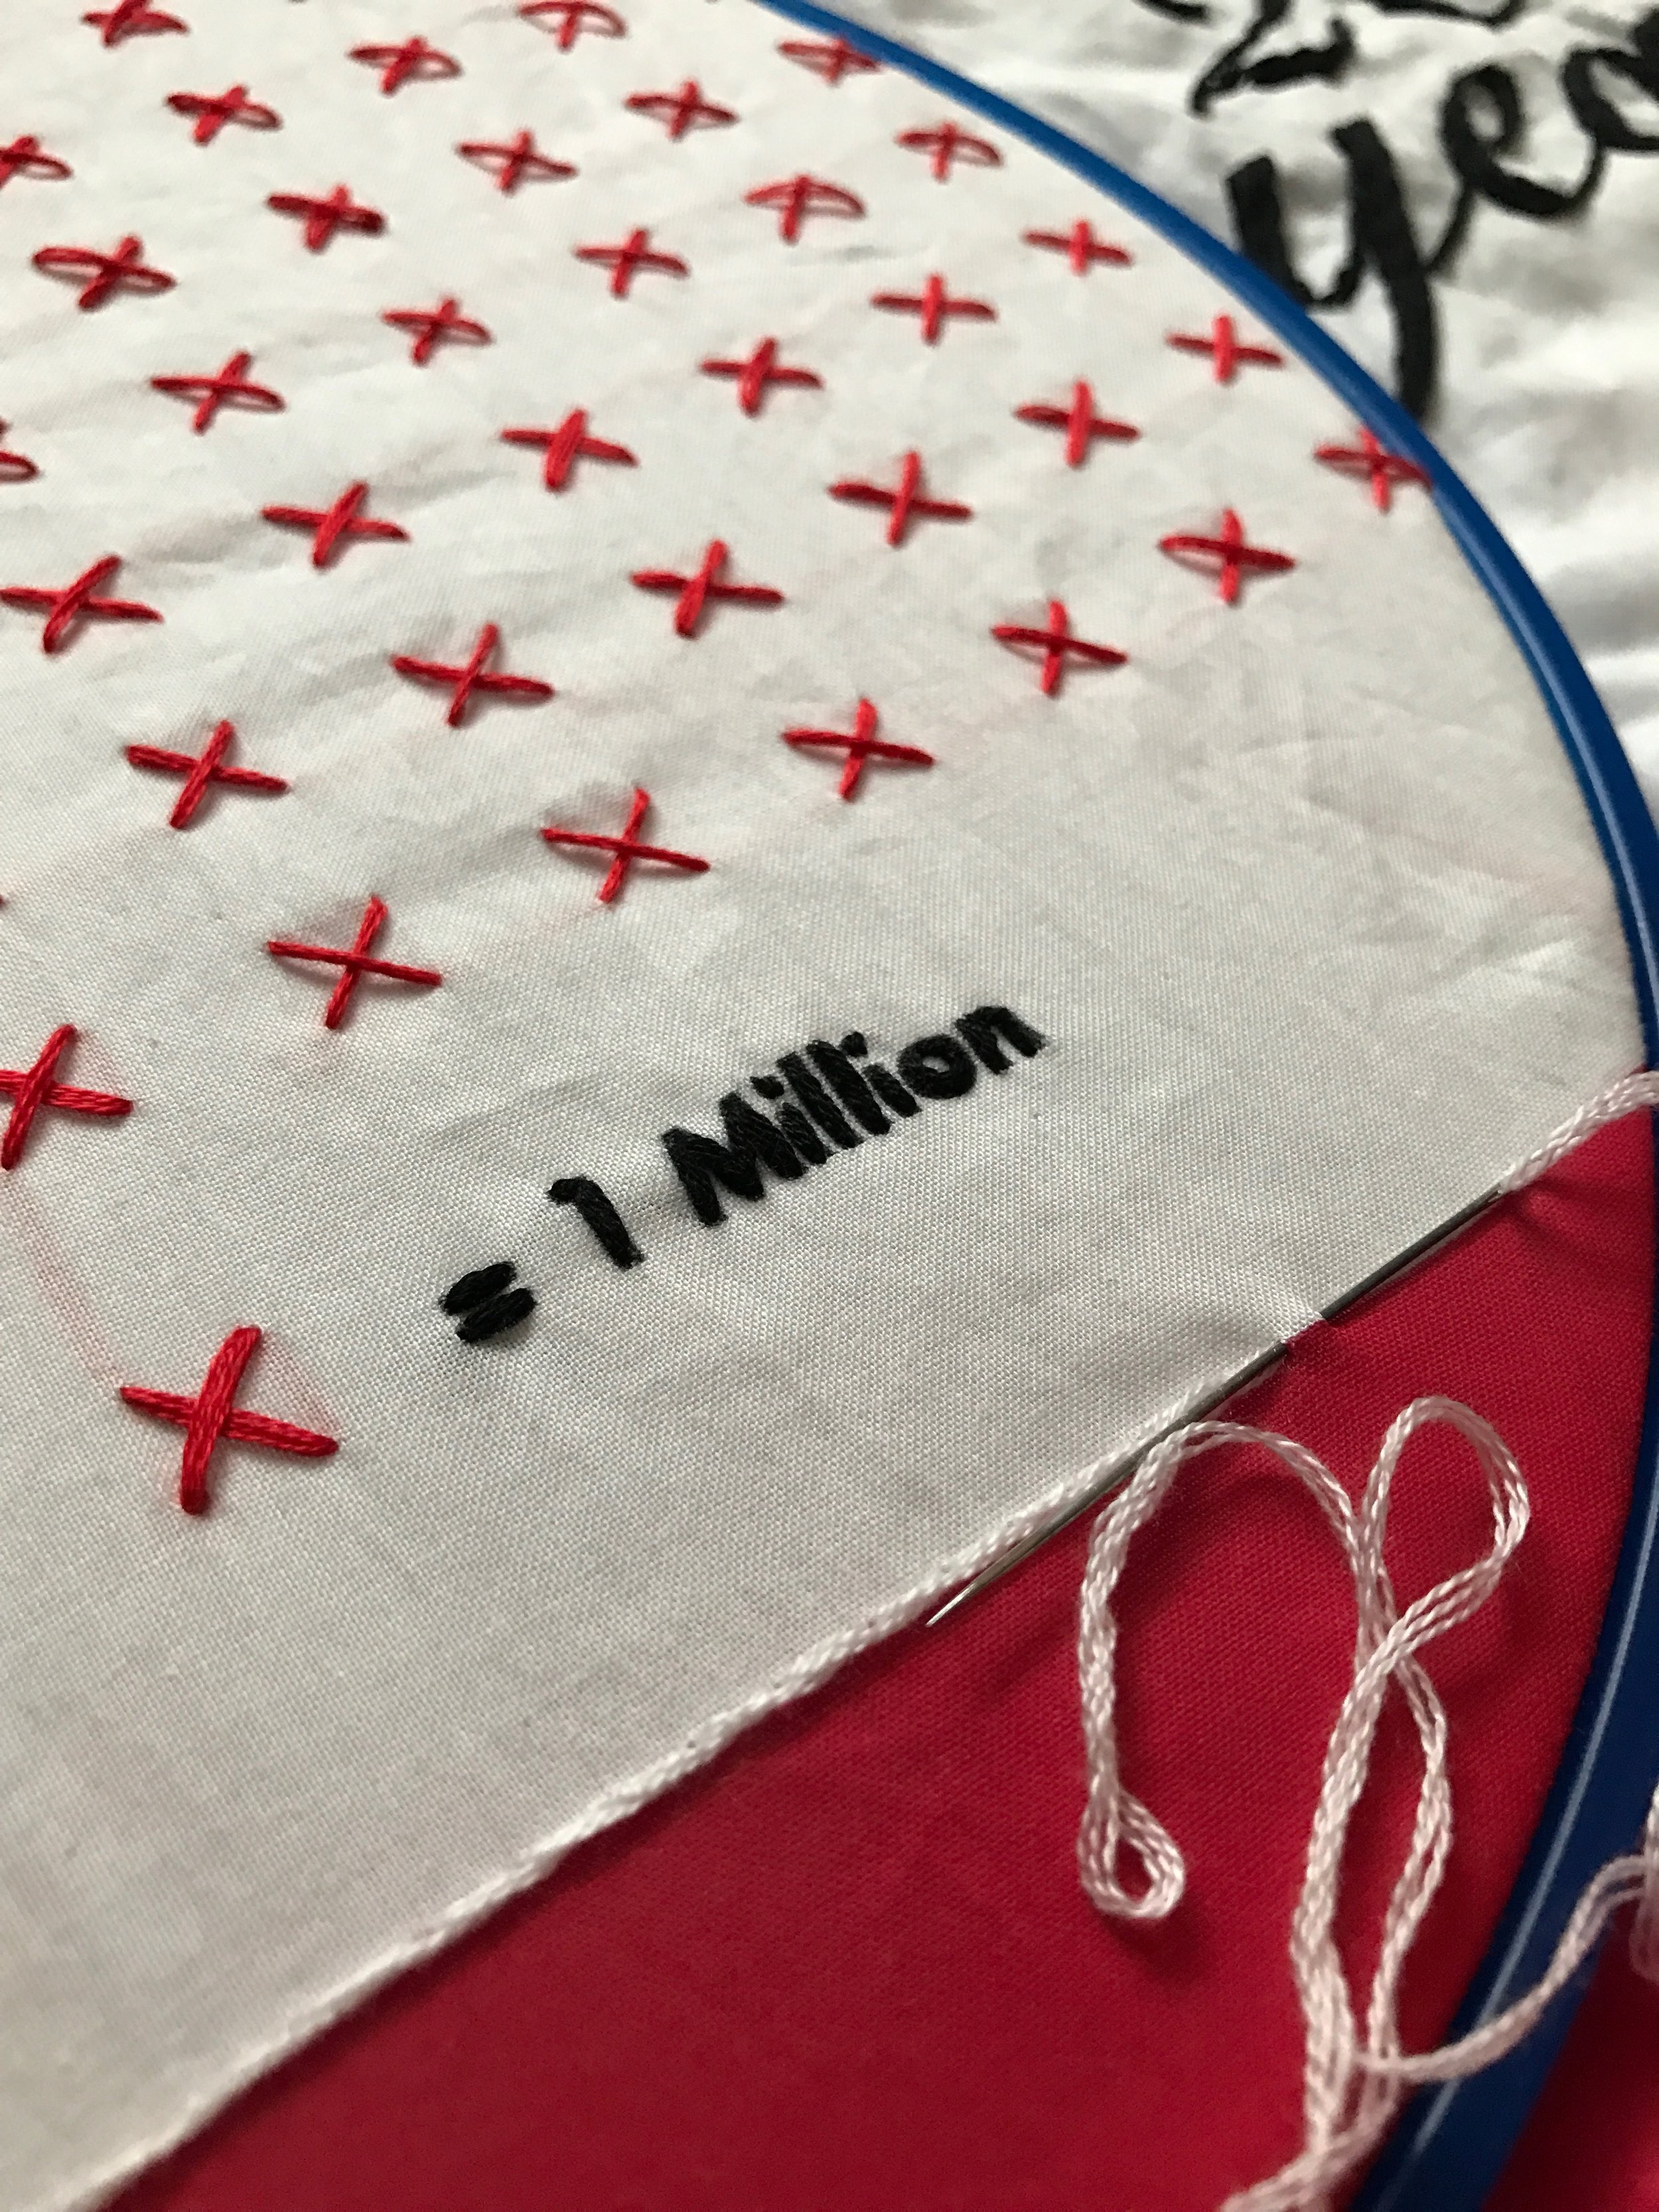
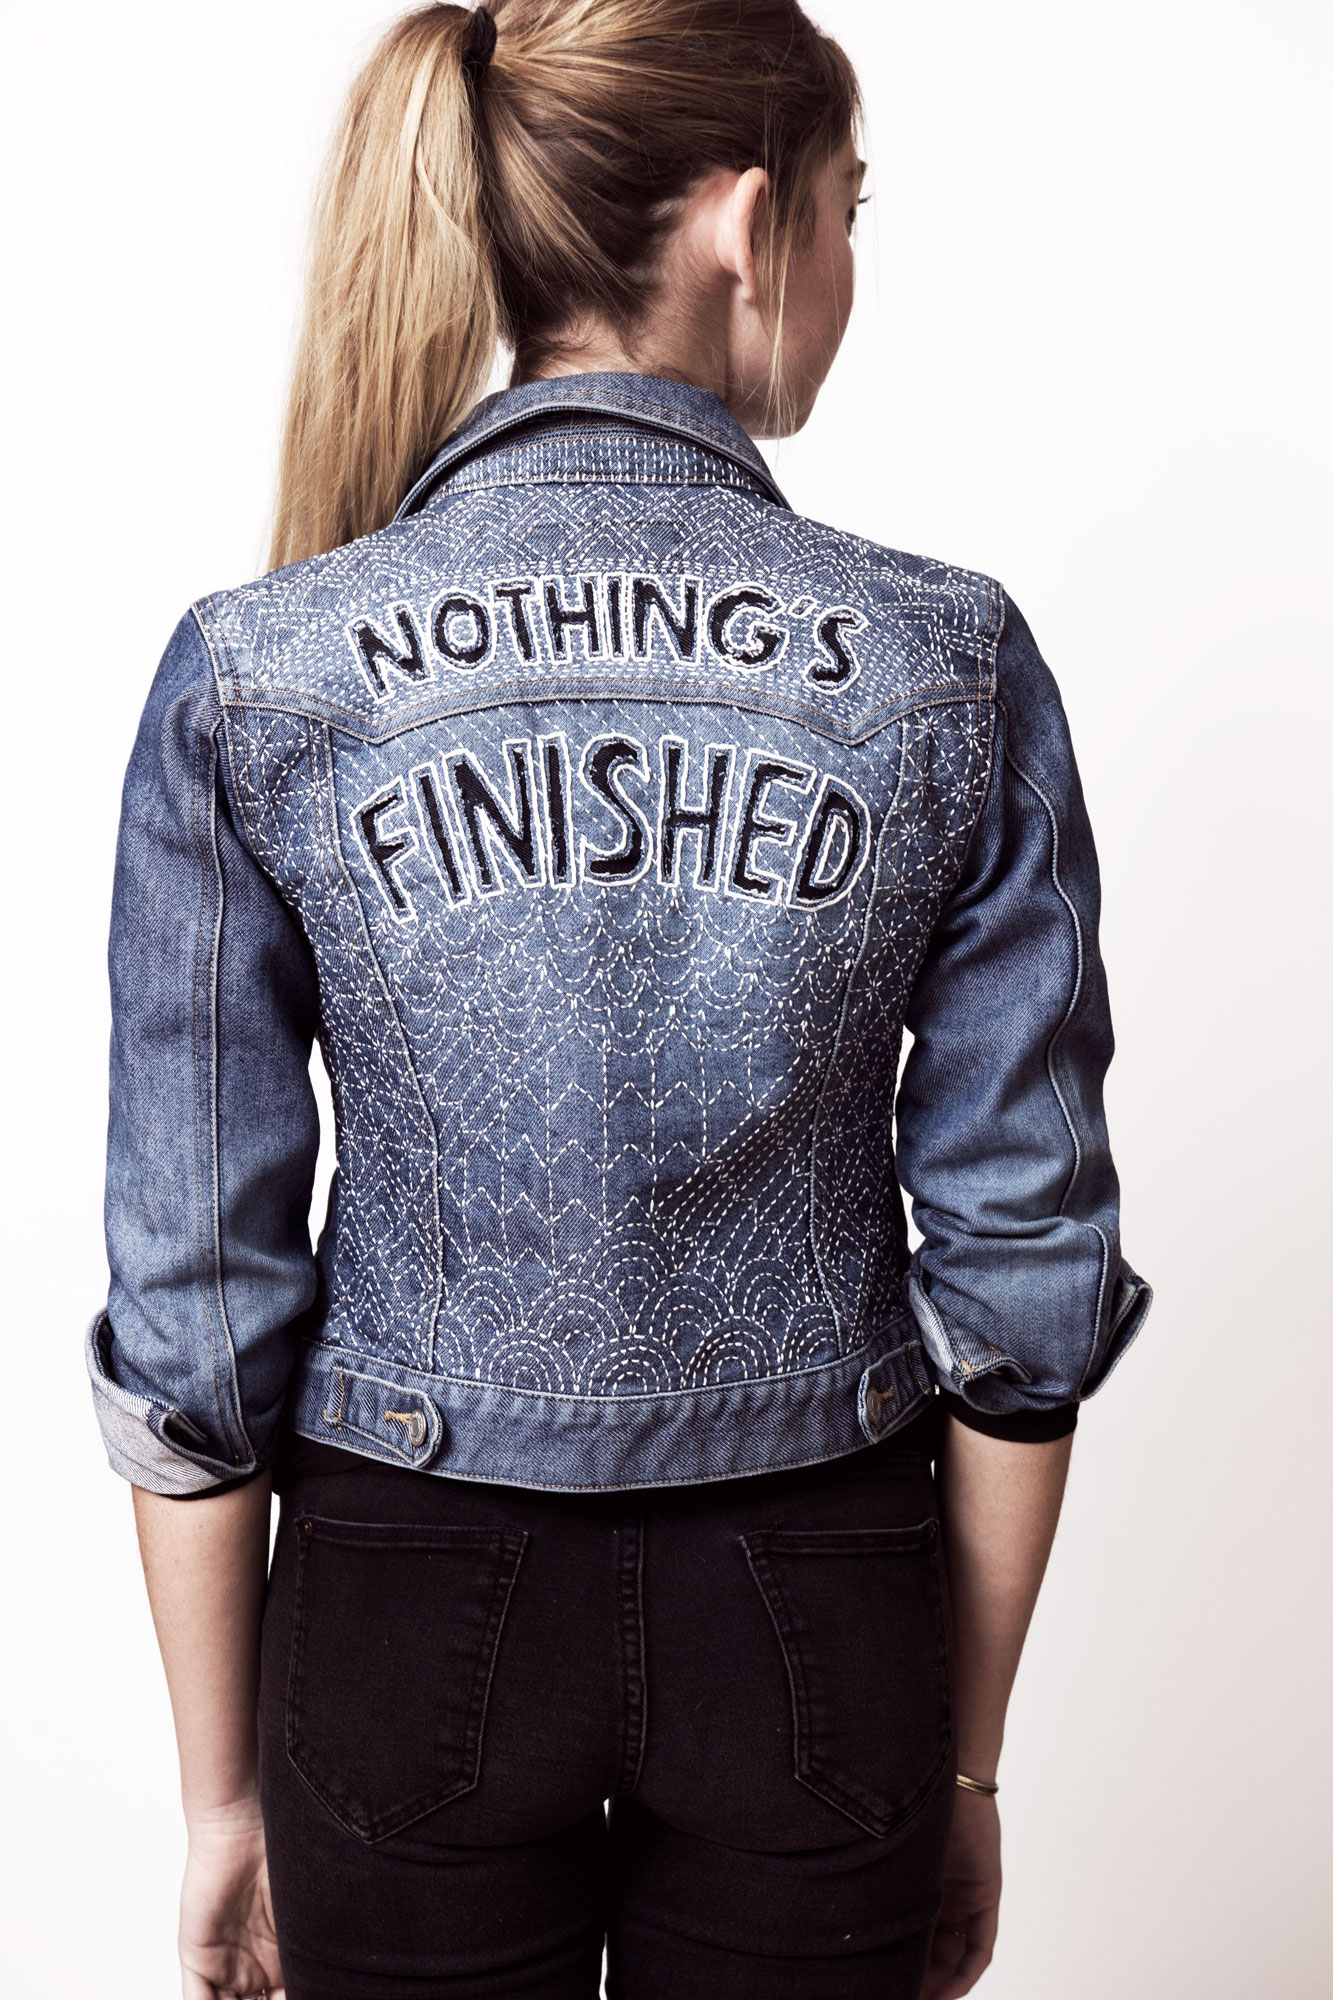
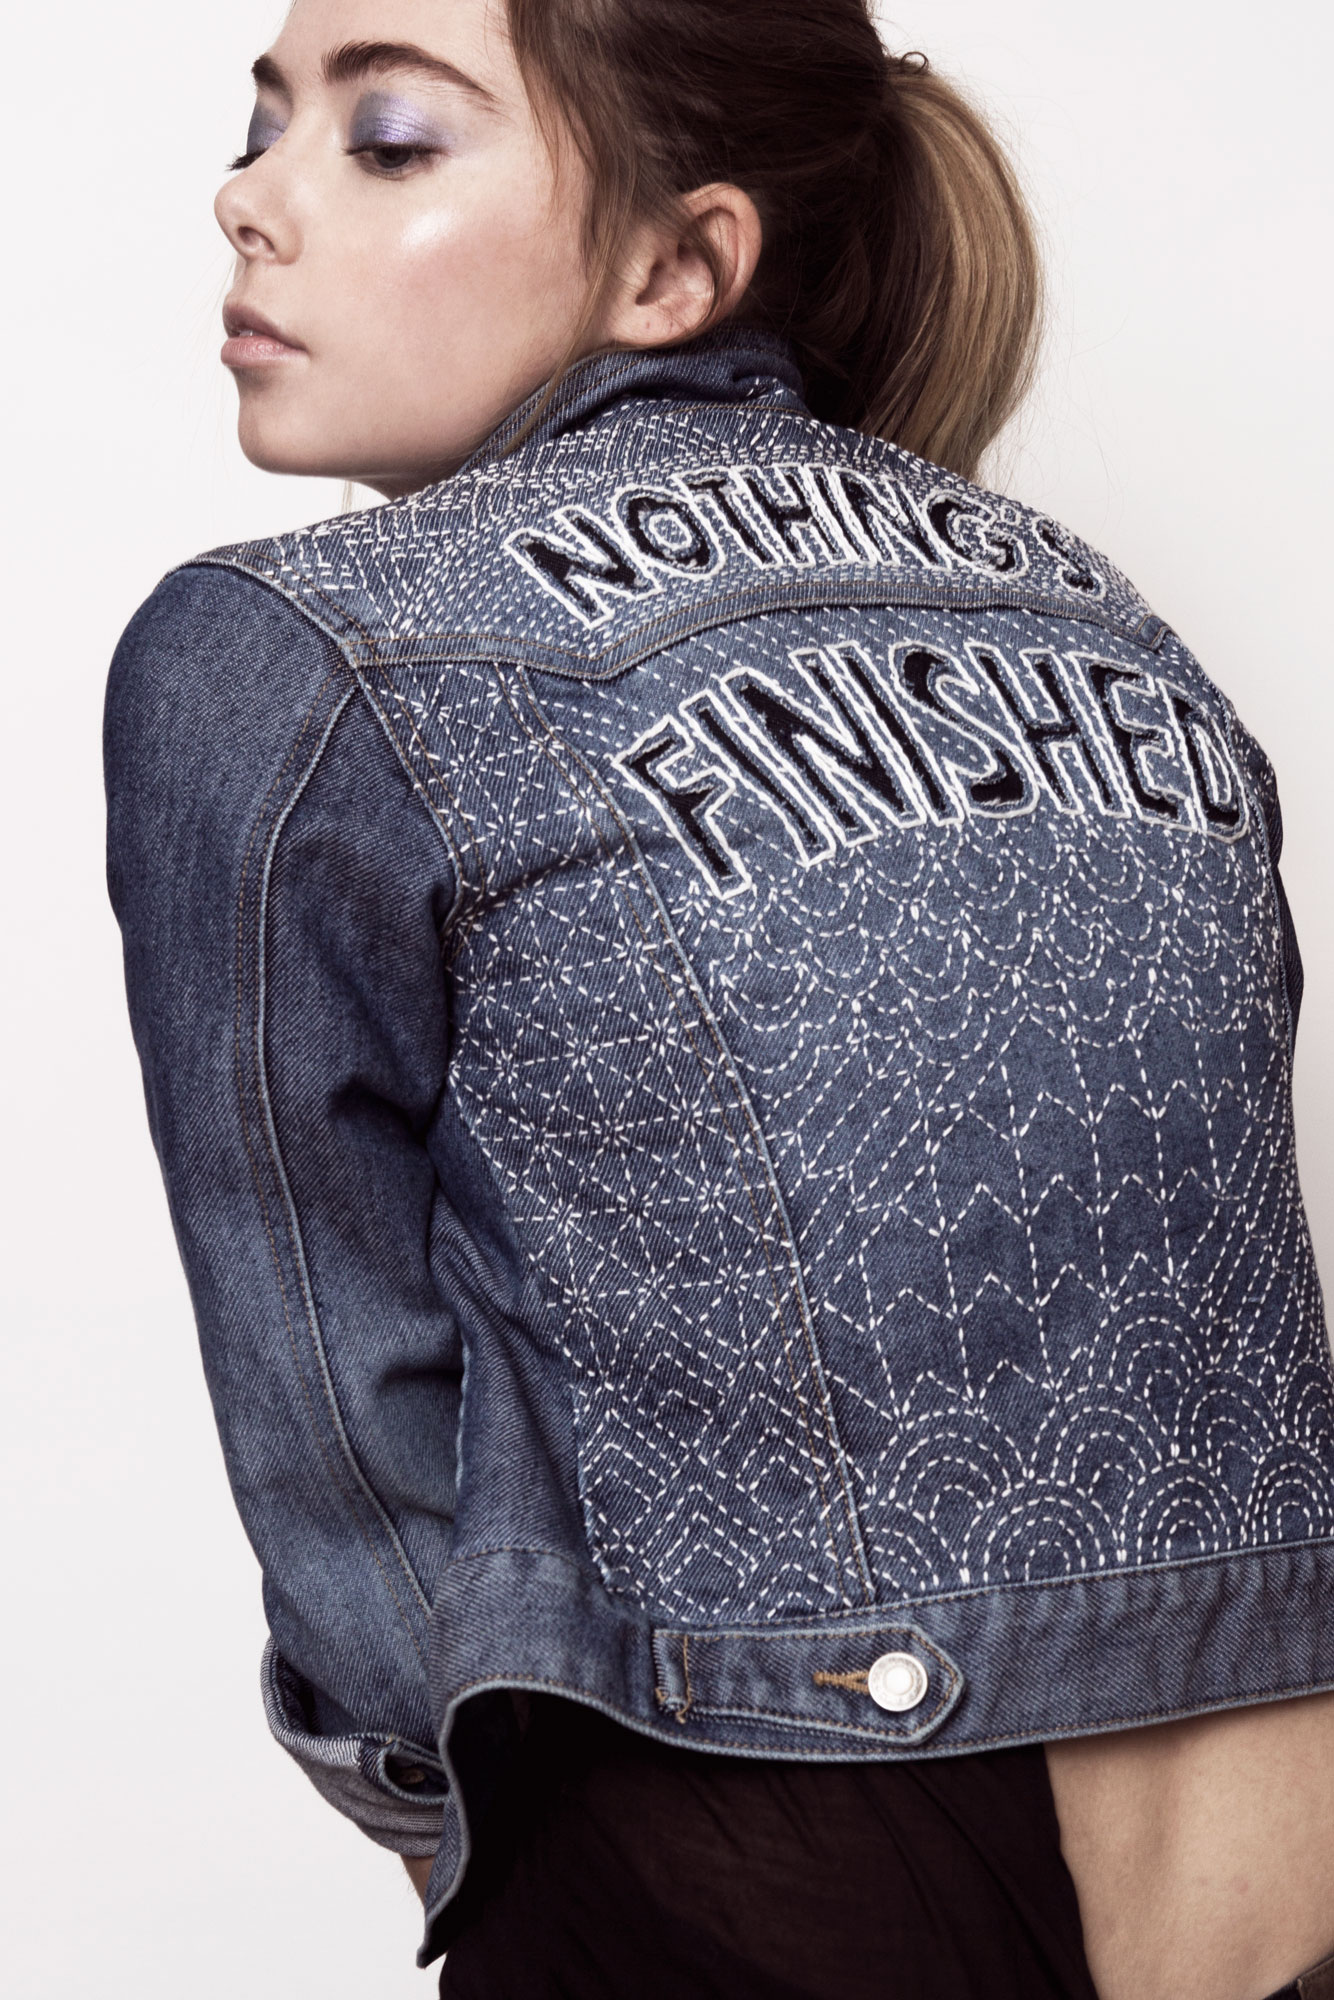
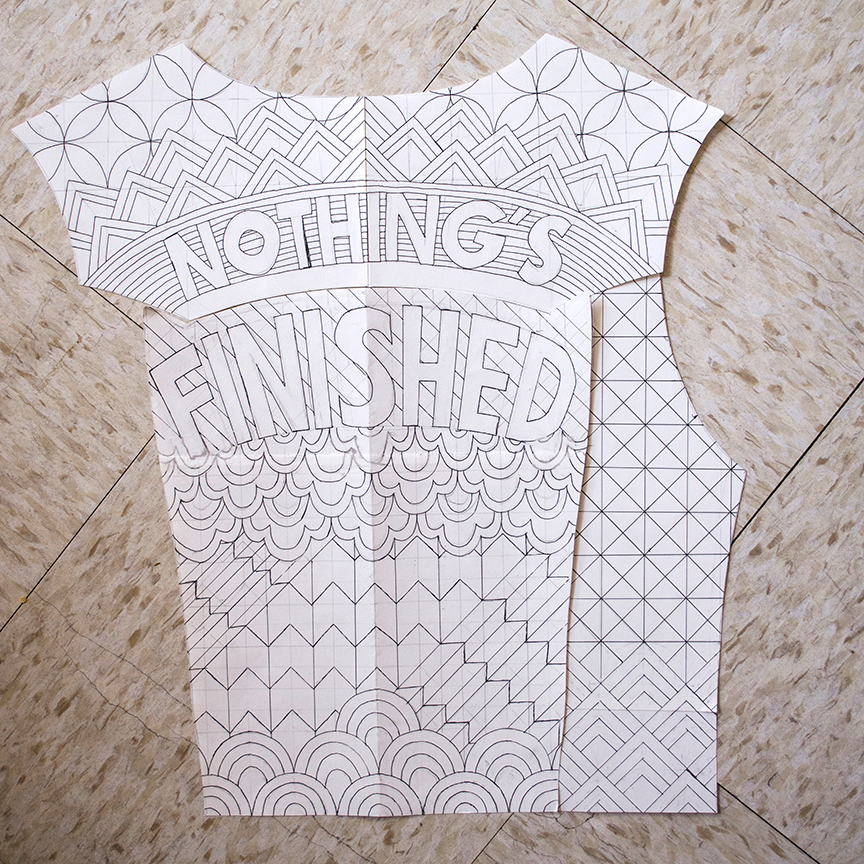
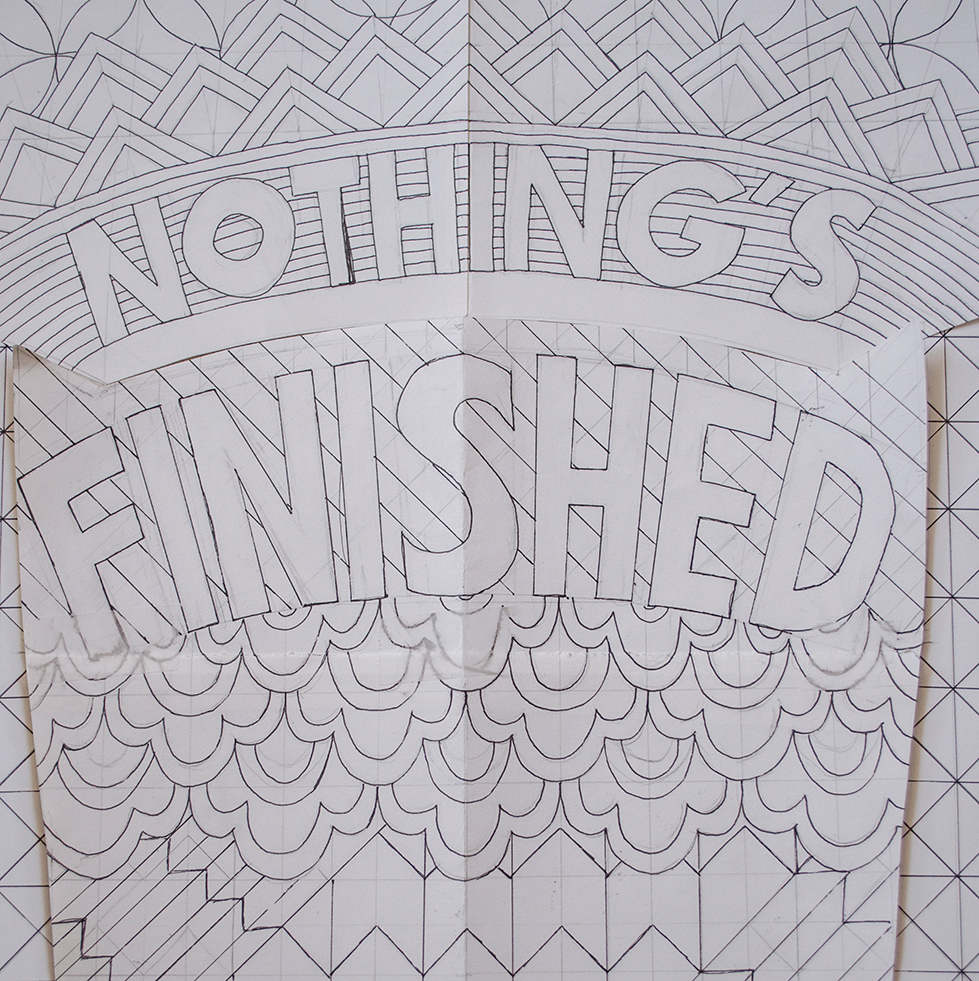
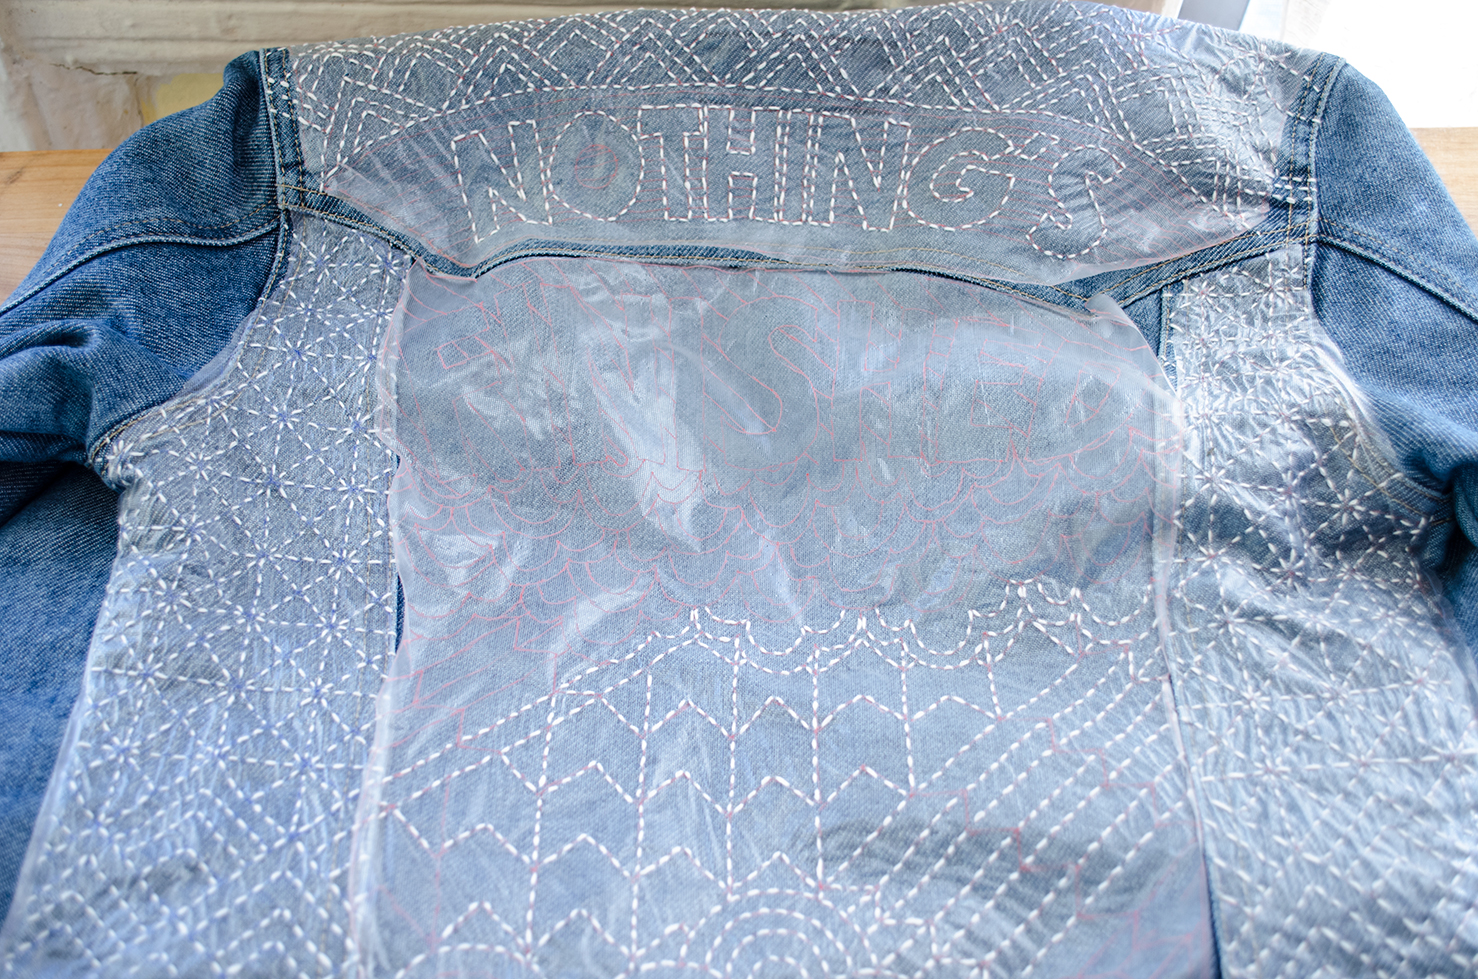
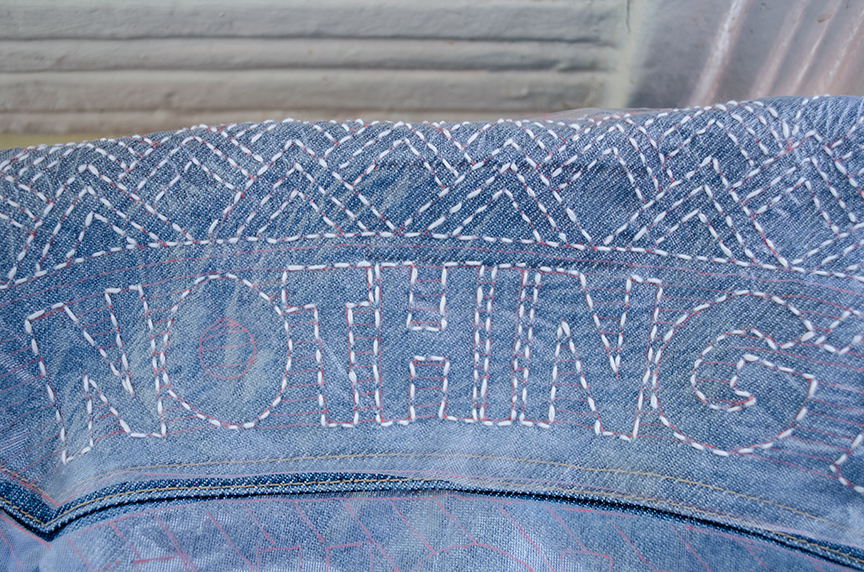
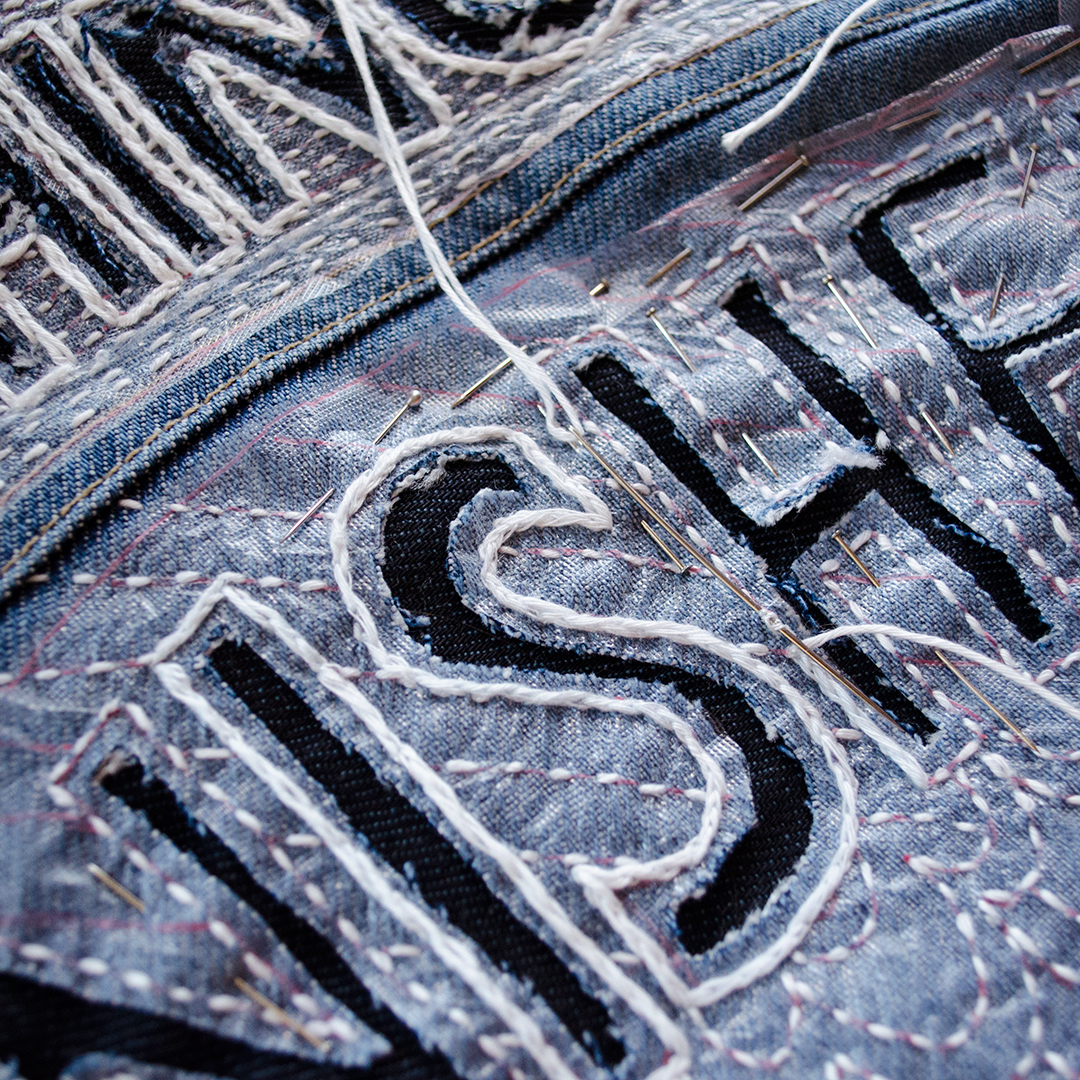
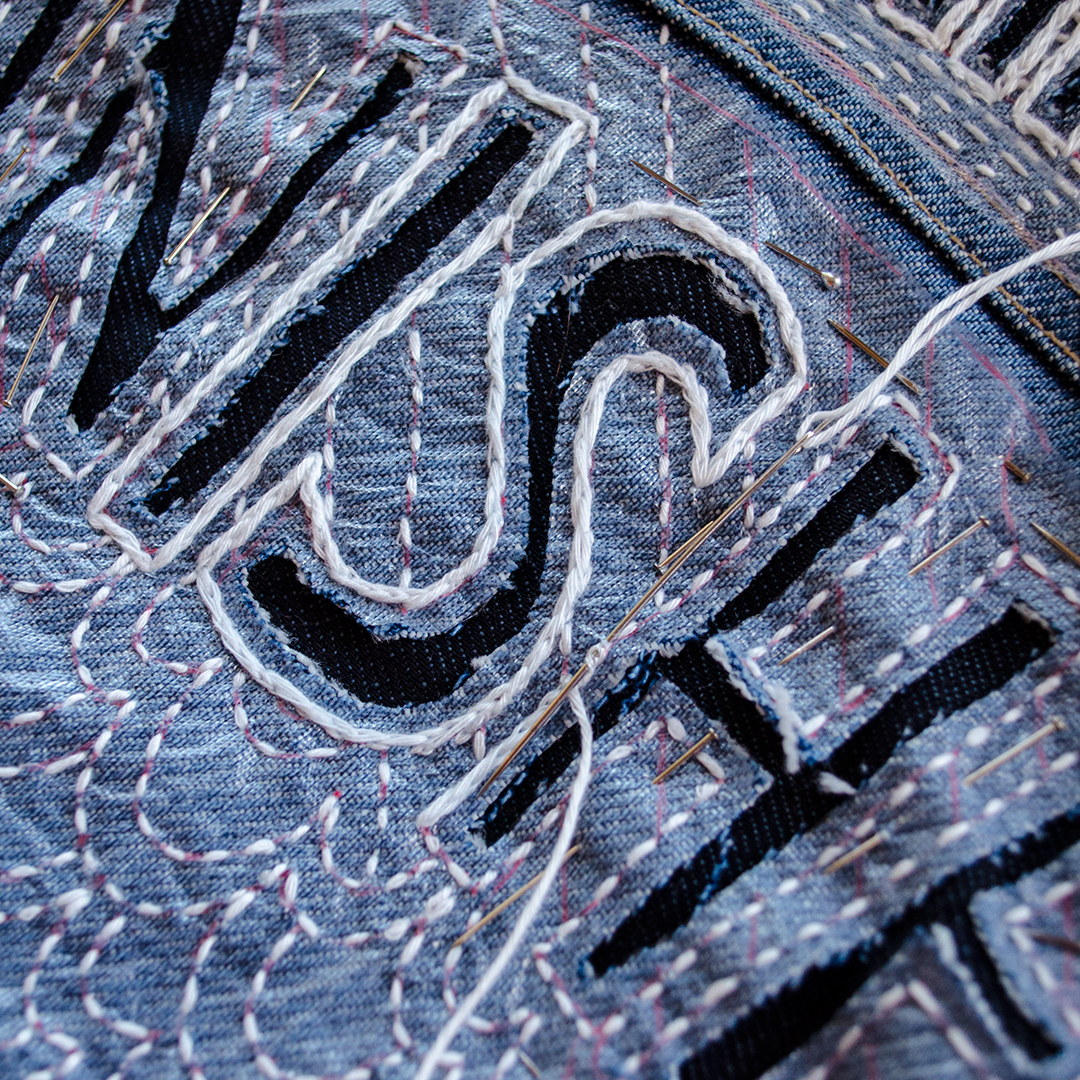
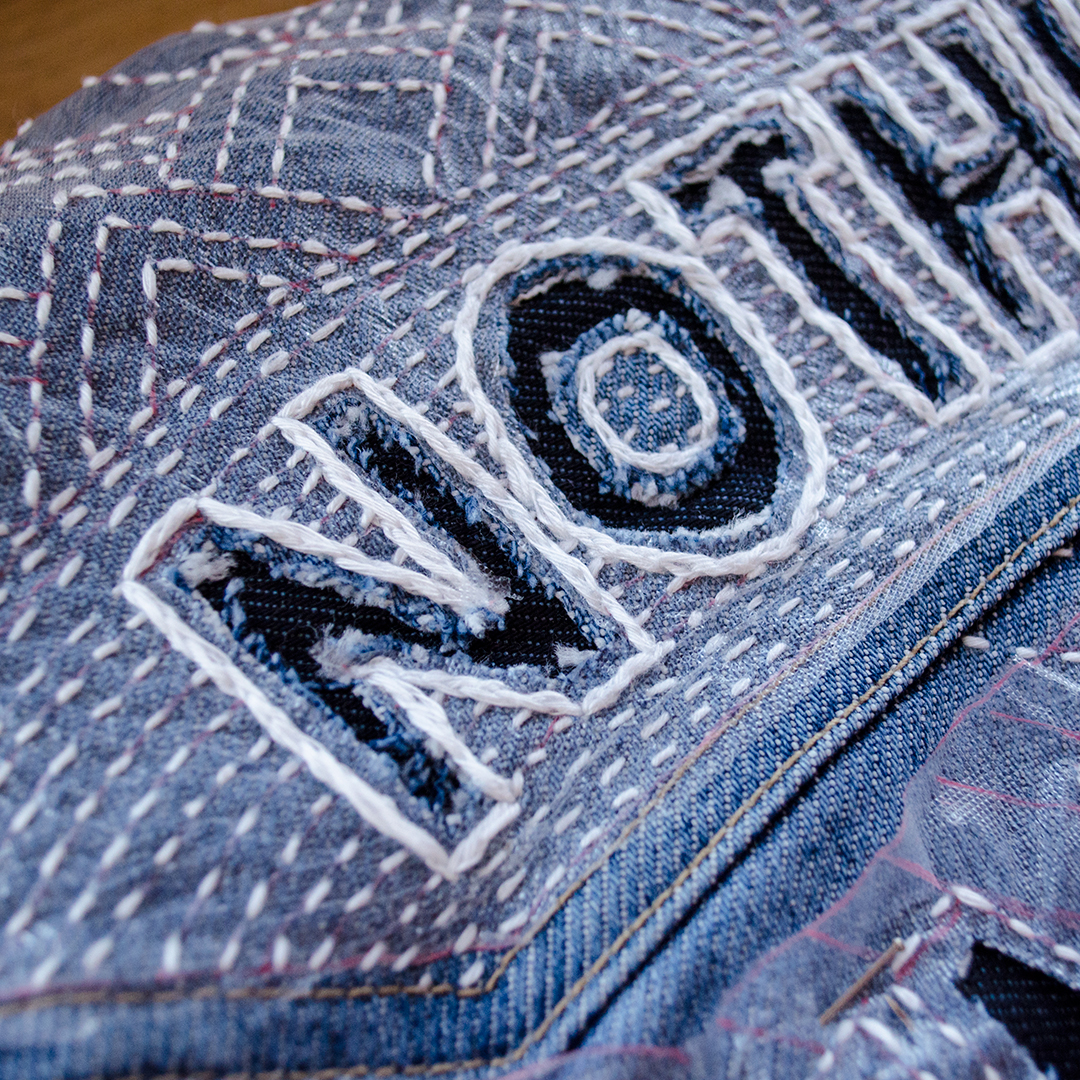
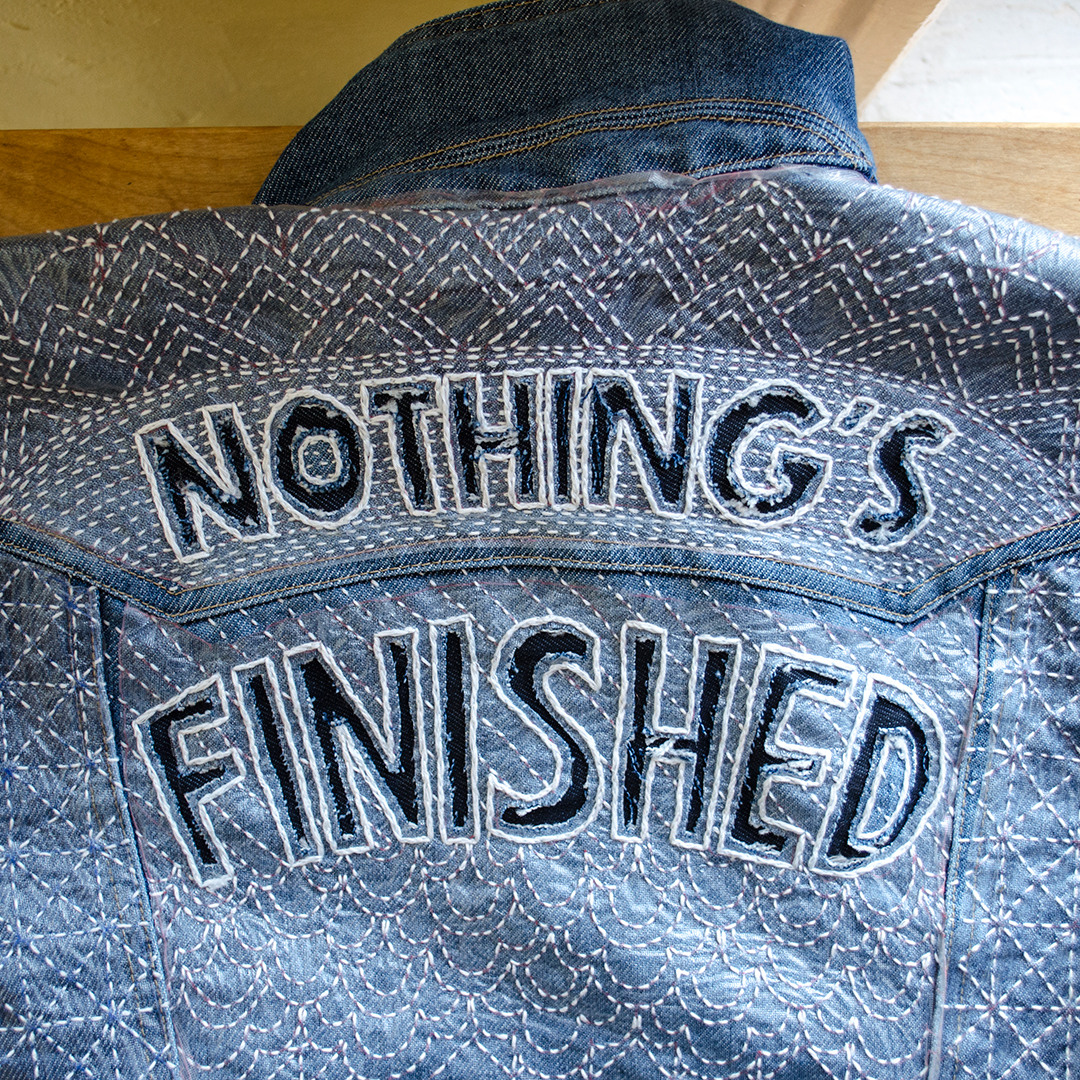
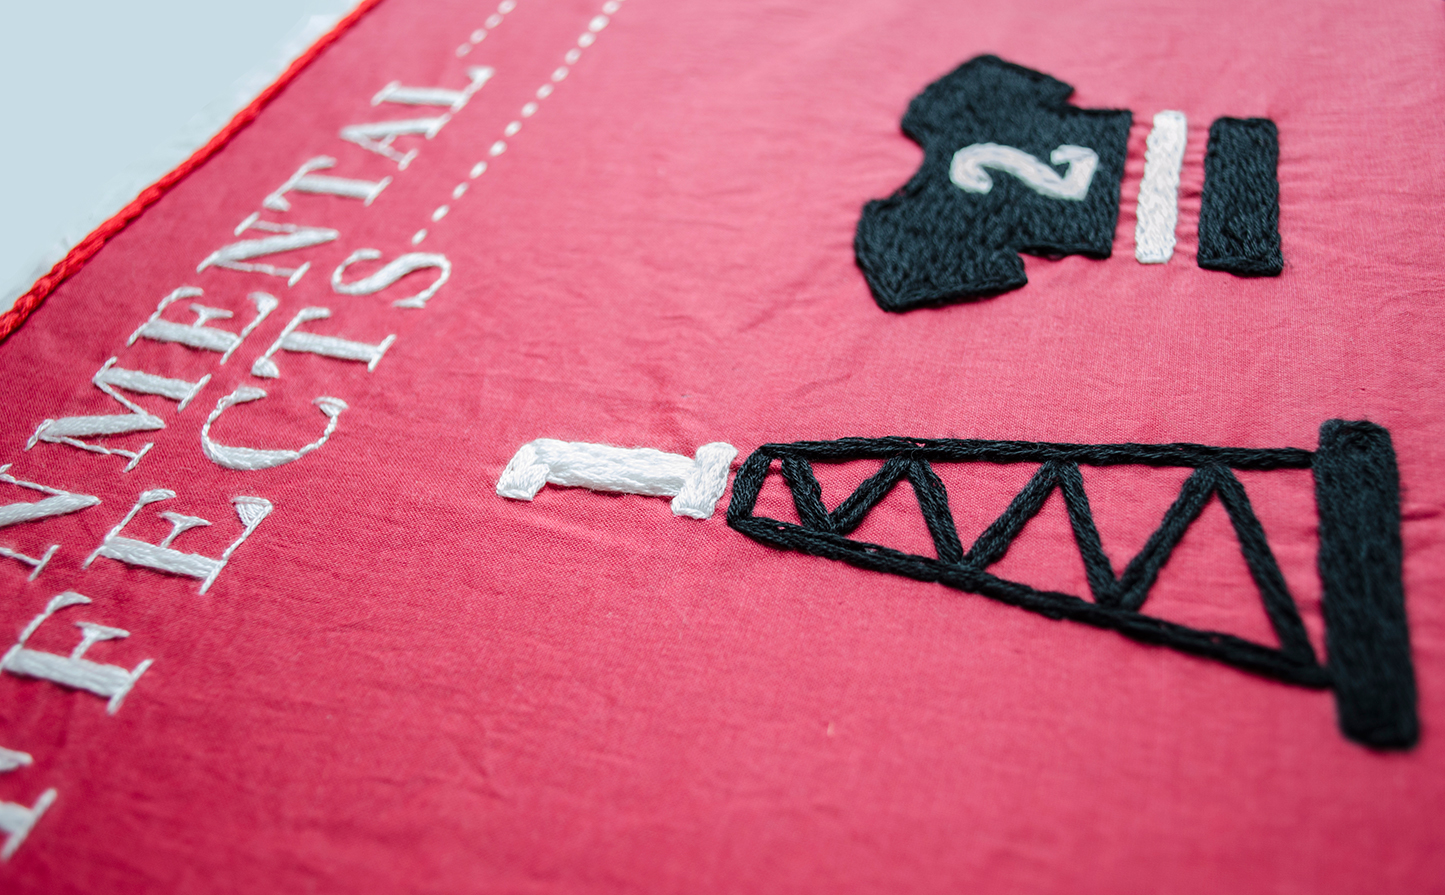
I am experienced in hand and machine embroidery, applique, and tailoring. The preciseness of this project, however, meant that I needed to do a lot of problem solving. Normally, I will either freehand sketch or trace a paper sketch onto my fabric using a lightbox. In the past, I’ve also treated fabric with bubble jet set, ironed it onto freezer paper, and run it through a printer in order to get my template to stitch over. The infographic really needed to be designed on the computer, and as I wanted it to look fairly precise, the freehand tracing method wouldn’t have worked. I made some test swatches and quickly realized that it was going to have to be pretty big in order to read well and look as neat as I wanted. Of course, that also meant it was going to take a lot longer. I originally figured it could be like 8” wide, and would take maybe a month to embroider, which is laughable. The fabric pieces are 17” wide, 13.3 feet long, and took 4 months to embroider. I am aware that I almost always underestimate how long my projects take, but this was ridiculously off.
That said, it felt like I made quick progress throughout- it is just really BIG. Obviously, at that size ironing the fabric onto pieces of freezer paper and running it through a home printer wasn’t going to work. What I ended up doing instead was getting it printed on fabric via Spoonflower. This worked GREAT. I designed the infographic in InDesign, then broke it up so that it would fit onto their fabrics according to their specifications, and then used that as a template to stitch over. The downsides were that Spoonflower is super slow- I ordered test swatches first (which is how I figured out that the text would have to be large or else I would run into legibility issues), which took 9 business days to arrive. I used the swatches to adjust the sizing and transparency of the colors, then sent out for the final fabric, which took at least another 9 business days to come. It was basically a whole month of researching, planning, designing, and ordering fabric before I even began the stitching part.
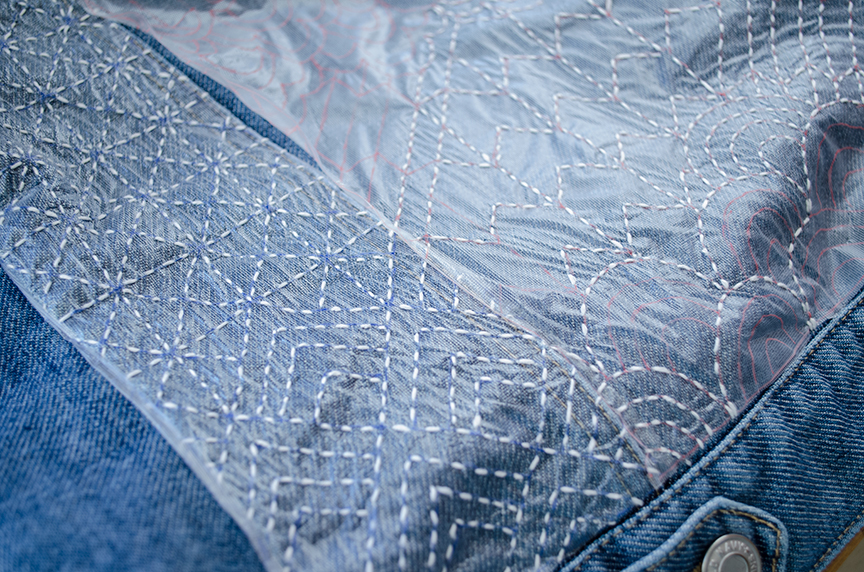
That said, it worked super well. I ordered gigantic spools of red, black, and white embroidery floss off of Amazon. I mostly separated the threads out and used 2 or 3 threads, unless I needed to fill in something large. I think using 2 threads looks the nicest, though I varied it depending on the font sizes and weights. Recently I’ve been into embroidering with just a single regular sewing thread, but for this project, that would have taken waaayyy too long. I like hand embroidery because it’s so easy to pick up and put down. I worked on this most days in the evening, and found it very enjoyable and relaxing.
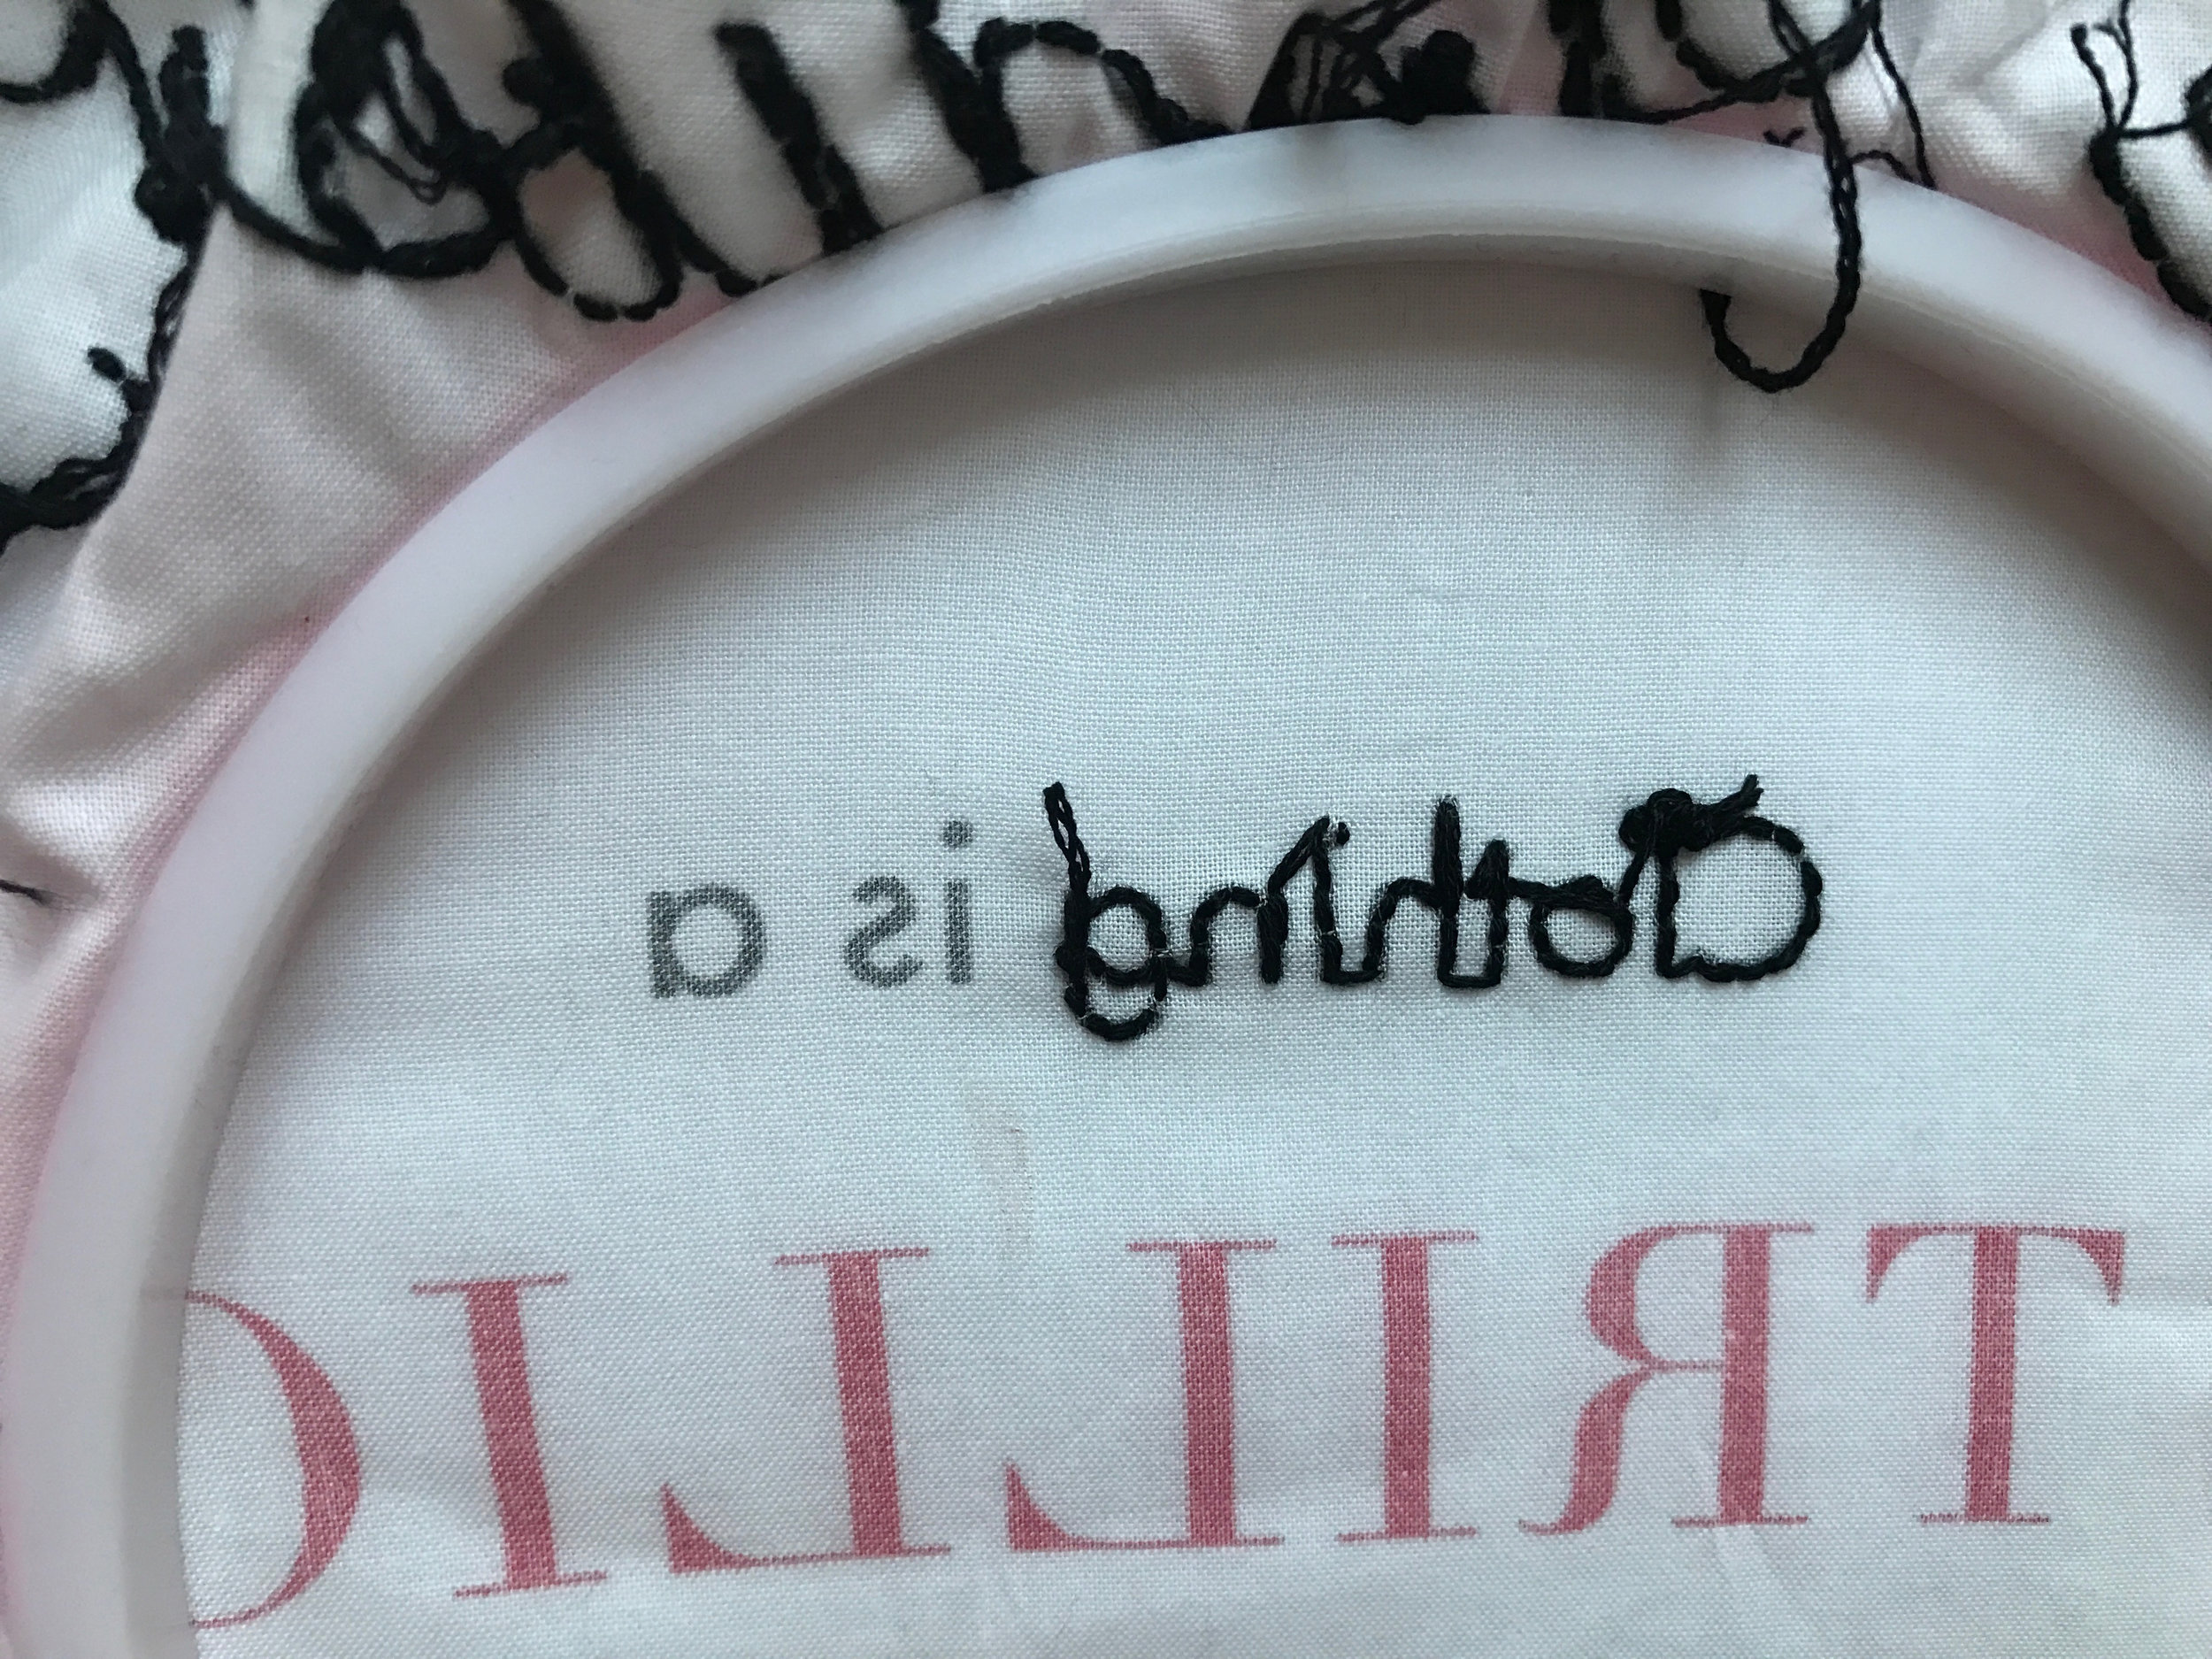
When all the pieces were finished stitching, I had to figure out how to scan them all in. This was actually the worst, most tedious part to me. They really needed to be stretched tight so that they weren’t distractingly wrinkled and messy looking, but of course, they’re way too large to fit on my scanner. I ended up buying a plastic cutting board from the dollar store, covering it with black paper, and then pinning the pieces to the cutting board in sections. Then, I went back and stretched each embroidered part over the largest embroidery hoop I have (10” I think?), pulled it as tight as possible, and scanned that. It took over a week, and I ended up with like 120 scans or something crazy. I pieced them all together in photoshop. I actually had to do a fair amount of work digitally- just piecing all the best parts together was a nightmare. The problem I found was that I wanted there to be SOME texture so that you could quickly tell it was all sewn and handmade, and that the background was actually really fabric, but too much looked messy. It was a really fine line, but I’m satisfied with where it ended up.
Some Thoughts Upon Finishing
When I conceived of the idea, did the research, and designed the infographic, I felt like I was being pretty thorough. In the 4 months of stitching that followed, however, I had plenty of time to contemplate, and realized that I spent less than a week on the research, about a day on writing, and then maybe a week on the design. And I had to admit to myself that I went through that first part, particularly the writing, really quickly because I was so eager to get to the sewing. As I was stitching and reading back the words I’d written, a lot of times I felt a little like...ugh. Part of it is that I’m not a writer, and it was a kind of like hearing your own voice on camera and getting uncomfortable. But another part of it was that given the amount of time the production took, I felt very viscerally that if I’m going to work in this way, I need to feel REALLY STRONGLY about the subject matter. In retrospect this is obvious, but if I’m asking viewers to look at something and spend time with it, and notice that I spent a lot of time with it, I really want to feel like my message is clear and from my heart. I’m not sure what that will be yet, but I’m thinking about it way more deeply now than I was before starting this. I should also probably team up with a copywriter.
Sources
“Global fashion industry statistics - International apparel." FashionUnited. FashionUnited Group, 2016.
Vatz, Stephanie. “Why America Stopped Making Its Own Clothes.” KQED News. KQED Inc., May 24, 2013.
Conca, James. “Making Climate Change Fashionable - The Garment Industry Takes On Global Warming.” Forbes. Forbes Media, LLC., December 3, 2015.
Sweeny, Glynis. “Fast Fashion Is the Second Dirtiest Industry in the World, Next to Big Oil.” EcoWatch. EcoWatch, August 17, 2015.
Wicker, Alden. “Fast Fashion is Creating an Environmental Crises.” Newsweek. Newsweek, LLC., September 1, 2016.
Goldberg, Eleanor. “These African Countries Don’t Want Your Used Clothing Anymore.” Huffington Post. Oath Inc., September 19, 2016.
Final quote adapted from Jacob Lund Fisker of the Early Retirement Extreme blog, April 14, 2009
Other References:
Cline, Elizabeth L. "Overdressed: The Shockingly High Cost of Cheap Fashion." New York, NY: Portfolio/Penguin, 2013.